 Pin It
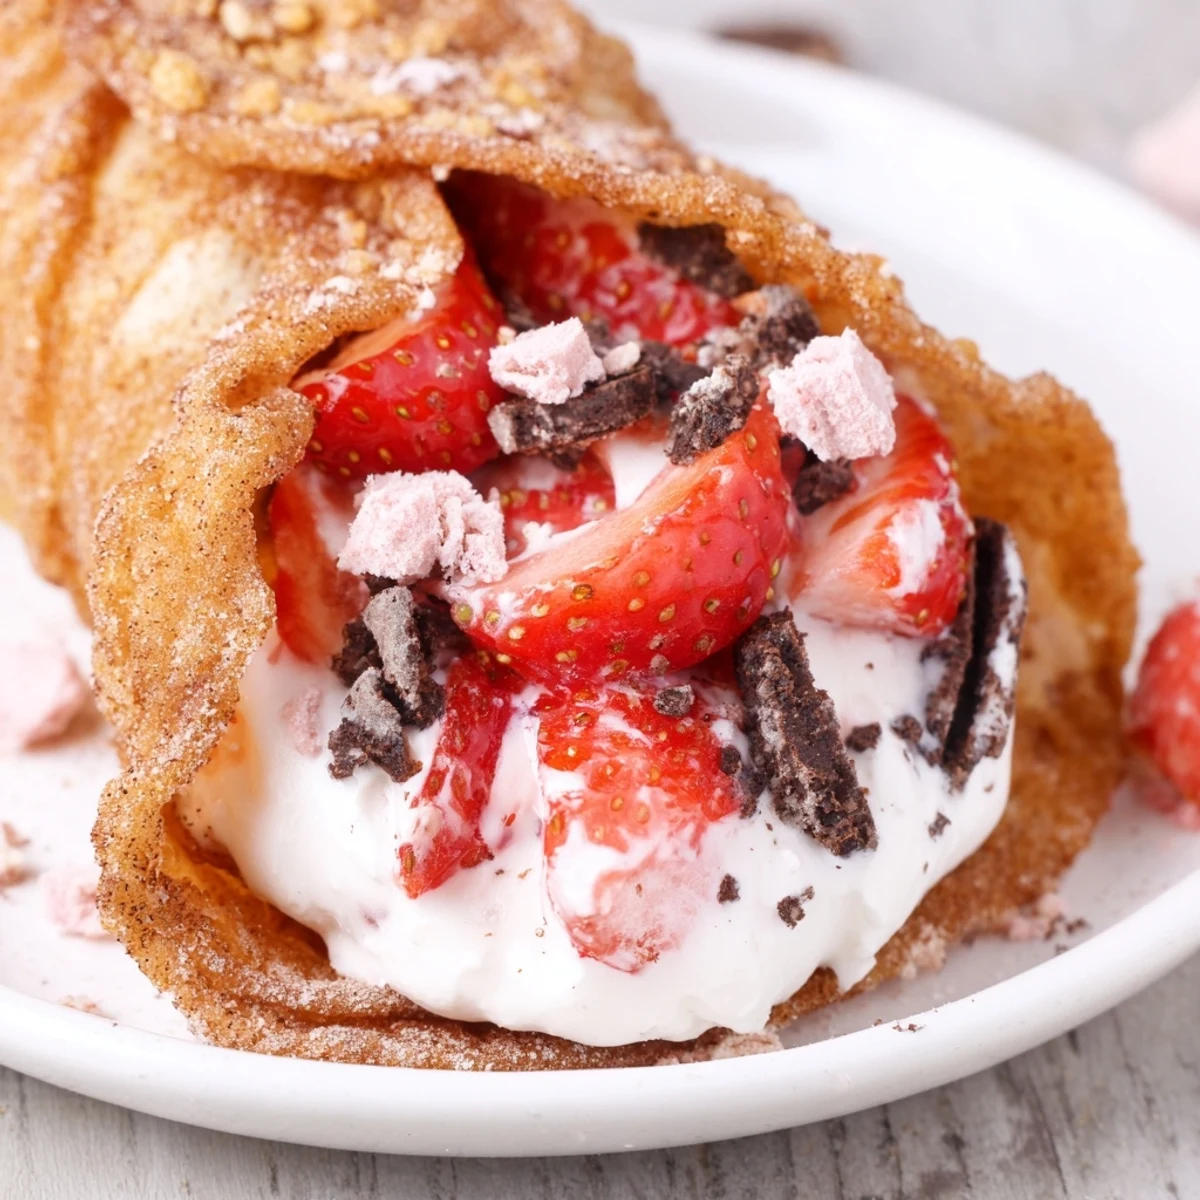
 These playful cheesecake tacos transform crispy cinnamon-sugar tortilla shells into edible vessels for silky vanilla cream cheese filling. Fresh strawberries macerated with lemon juice add brightness, while crushed vanilla cookies and freeze-dried strawberries create an irresistible buttery crumble topping.
The dessert comes together quickly with just 10 minutes of baking time for the shells. Prepare the components ahead and assemble just before serving for optimal texture. The combination of warm, crisp shells with cool, creamy filling and juicy fruit creates an irresistible contrast in every bite.
Perfect for gatherings, these handheld treats are as fun to eat as they are delicious. The American fusion concept blends familiar cheesecake flavors with a unexpected taco presentation that's sure to spark conversation.
The first time I served these at a dinner party, my friend Sarah actually laughed out loud when I brought the platter to the table. She thought I was playing some kind of joke, serving tacos for dessert. But one bite in and the whole table went silent except for the crunch of shells and happy murmurs. Now they request them every time.
I stumbled on this idea during a summer when I was obsessed with fusion everything. My kids had helped me make regular tacos the night before, and I woke up thinking about how the taco shell shape would be perfect for holding cheesecake filling. The first batch had shells that were too soft and collapsed, but the flavor was there. After some trial and error with the oven rack method, they finally held their shape.
Ingredients
- 8 small flour tortillas: The smaller size creates the perfect handheld portion
- 2 tablespoons butter, melted: Helps the cinnamon sugar cling and adds richness
- 3 tablespoons granulated sugar: Creates that sweet crispy coating on the shells
- 1 teaspoon ground cinnamon: Warm spice that pairs beautifully with strawberries
- 8 oz cream cheese, softened: Make sure its truly room temp for smooth filling
- 1/2 cup heavy cream: Whips the filling into something light and airy
- 1/3 cup powdered sugar: Sweetens without graininess
- 1 teaspoon vanilla extract: Pure vanilla makes all the difference here
- 1 1/2 cups fresh strawberries, diced: Fresh is best, frozen gets too watery
- 2 tablespoons granulated sugar: Draws out the strawberries natural juices
- 1 teaspoon lemon juice: Brightens the strawberry flavor
- 8 vanilla sandwich cookies, crushed: Golden Oreos work perfectly
- 1/2 cup freeze-dried strawberries, crushed: Intense strawberry flavor without extra moisture
- 2 tablespoons unsalted butter, melted: Binds the crunch topping together
Instructions
- Shape and season the taco shells:
- Preheat your oven to 375°F and brush both sides of each tortilla with melted butter. Mix the sugar and cinnamon in a shallow dish, then press each tortilla into the mixture to coat evenly.
- Bake until crispy:
- Drape the coated tortillas over two bars of your oven rack so they hang down like taco shells. Bake for 8 to 10 minutes until theyre golden and crisp, then let them cool completely on the rack.
- Make the cheesecake filling:
- Beat the softened cream cheese until completely smooth, then add the powdered sugar and vanilla. Slowly pour in the heavy cream while beating until the filling becomes light and fluffy. Keep it chilled until youre ready to assemble.
- Prepare the strawberry topping:
- Combine the diced strawberries with sugar and lemon juice in a small bowl. Let this mixture sit for 5 to 10 minutes so the strawberries release their juices.
- Make the crunch topping:
- Mix the crushed cookies, crushed freeze-dried strawberries, and melted butter until everything is well combined and slightly sticky.
- Assemble the tacos:
- Fill each cooled shell with cheesecake filling using a piping bag or spoon. Top with the strawberry mixture and generously sprinkle with the crunch topping. Serve right away.
 Pin It
 Last summer, I made these for my nieces birthday and she told me it was the best dessert she had ever had in her entire nine years of life. Her mom texted me the next day asking for the recipe because she would not stop talking about them. That is when I knew these crunchy little tacos were something special.
Making Ahead
You can prepare all the components up to a day ahead. Store the shells in an airtight container, keep the filling and strawberry topping separate in the fridge, and assemble right before serving.
Shell Shaping Secrets
If your oven racks are too far apart, you can drape the tortillas over the grates of a cooling rack set on a baking sheet. The key is getting that classic taco shape with enough space between the sides for filling.
Serving Suggestions
These desserts are surprisingly versatile and pair well with lighter wines or after-dinner drinks. They also work beautifully as part of a dessert spread.
- Try dipping the shell edges in white chocolate before filling
- Raspberries or blueberries make excellent substitutions
- A glass of chilled rosé or sparkling wine complements them perfectly
 Pin It
 Watch your friends faces when you bring these out. That moment of confusion turning to delight is half the fun.
Recipe Questions & Answers
- → Can I make the taco shells ahead of time?
-
Yes, bake the cinnamon-sugar tortilla shells up to 2 days in advance. Store them in an airtight container at room temperature. They'll stay crispy and ready for filling when you're ready to serve.
- → What if I don't have an oven rack for shaping the shells?
-
You can drape tortillas over the grates of your oven rack, or use a taco shell mold if you have one. Alternatively, fold them over inverted cupcake tins or crumple foil into taco shapes and drape the tortillas over that.
- → Can I substitute the strawberries with other fruits?
-
Absolutely. Raspberries, blueberries, chopped peaches, or even diced mango work beautifully. Adjust the sugar slightly based on the fruit's natural sweetness. Macerating time remains the same.
- → How long will the assembled tacos last?
-
For best texture, serve immediately after assembling. The shells will soften over time from the filling. If you need to prep ahead, keep all components separate and fill just before serving, within 2-3 hours.
- → Can I make these gluten-free?
-
Yes. Use gluten-free flour tortillas and gluten-free vanilla sandwich cookies for the crunch topping. All other ingredients are naturally gluten-free. The texture and flavor remain excellent.
- → Can I freeze the cheesecake filling?
-
The cheesecake filling freezes well for up to 1 month. Thaw overnight in the refrigerator, then whip briefly with a hand mixer to restore fluffiness before piping into shells.
