 Pin It
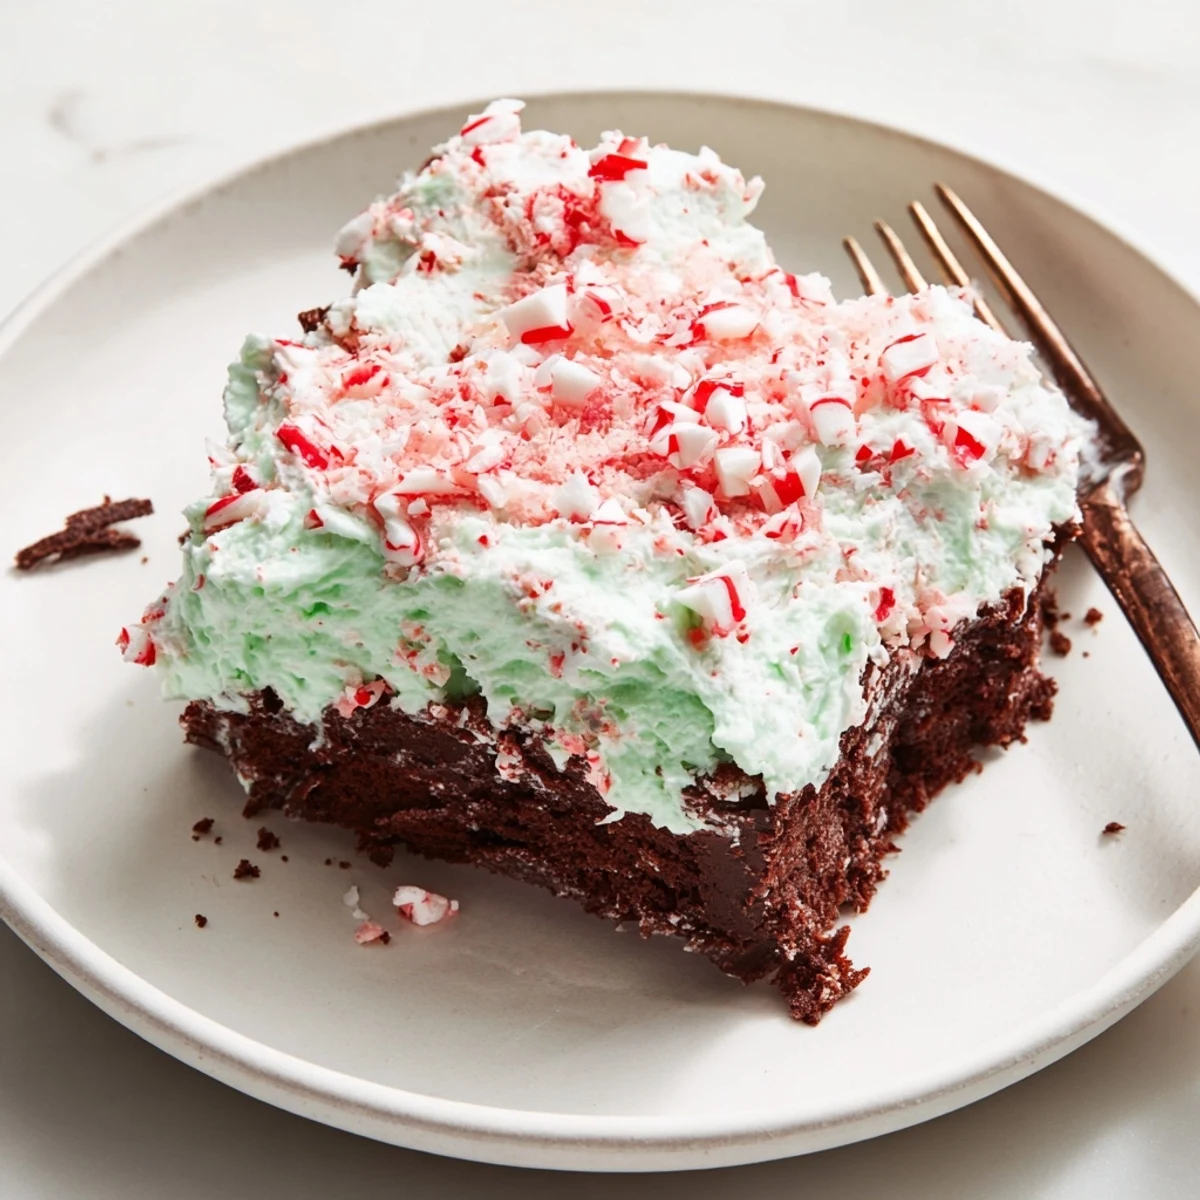
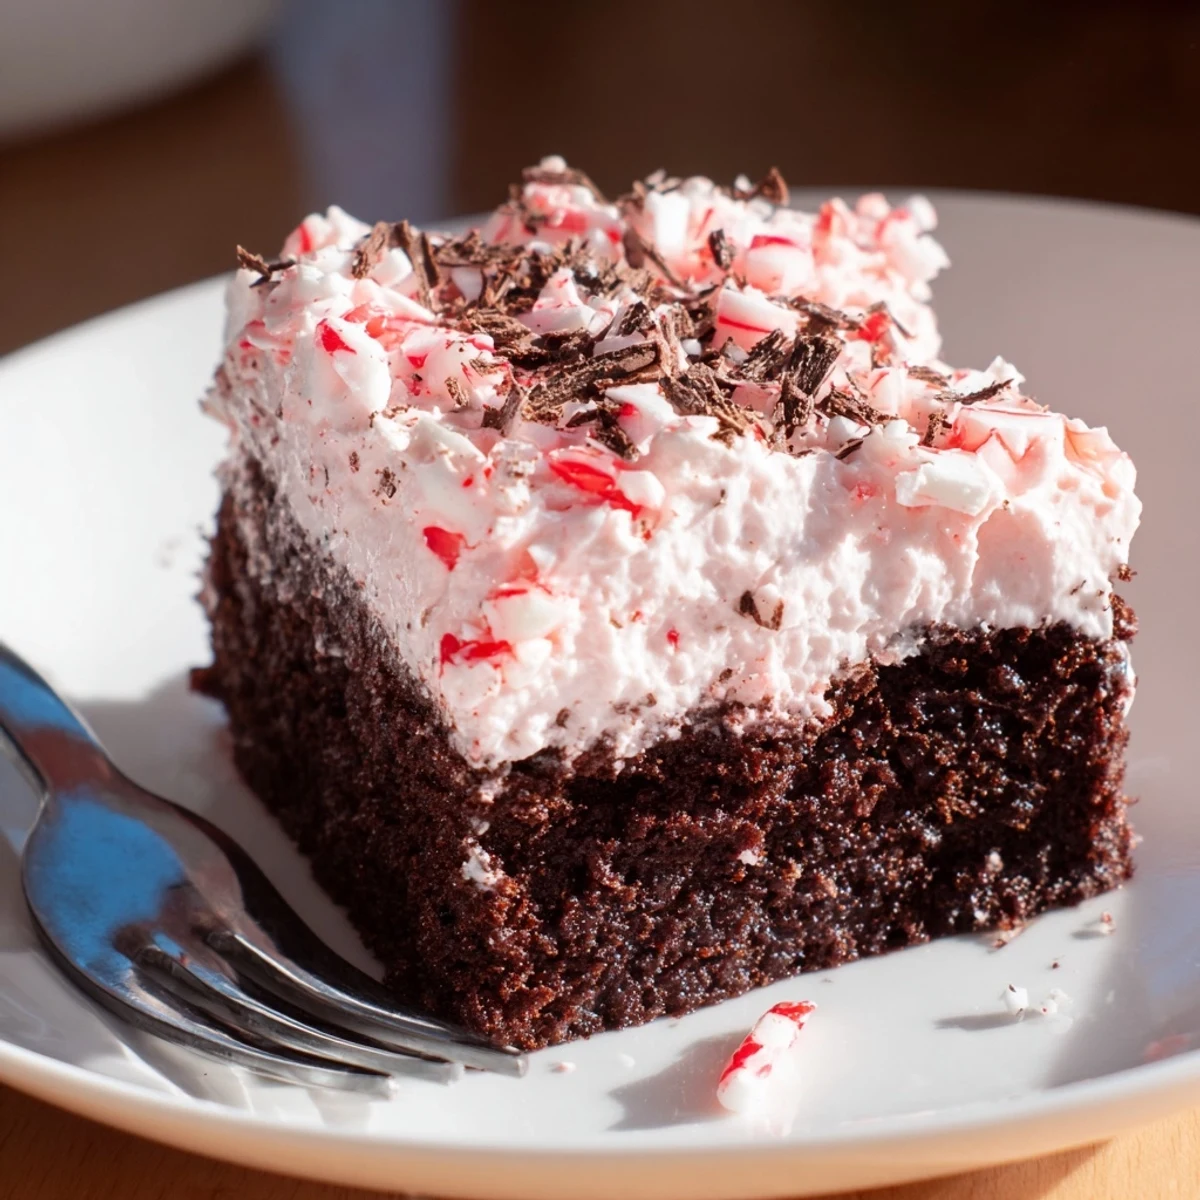
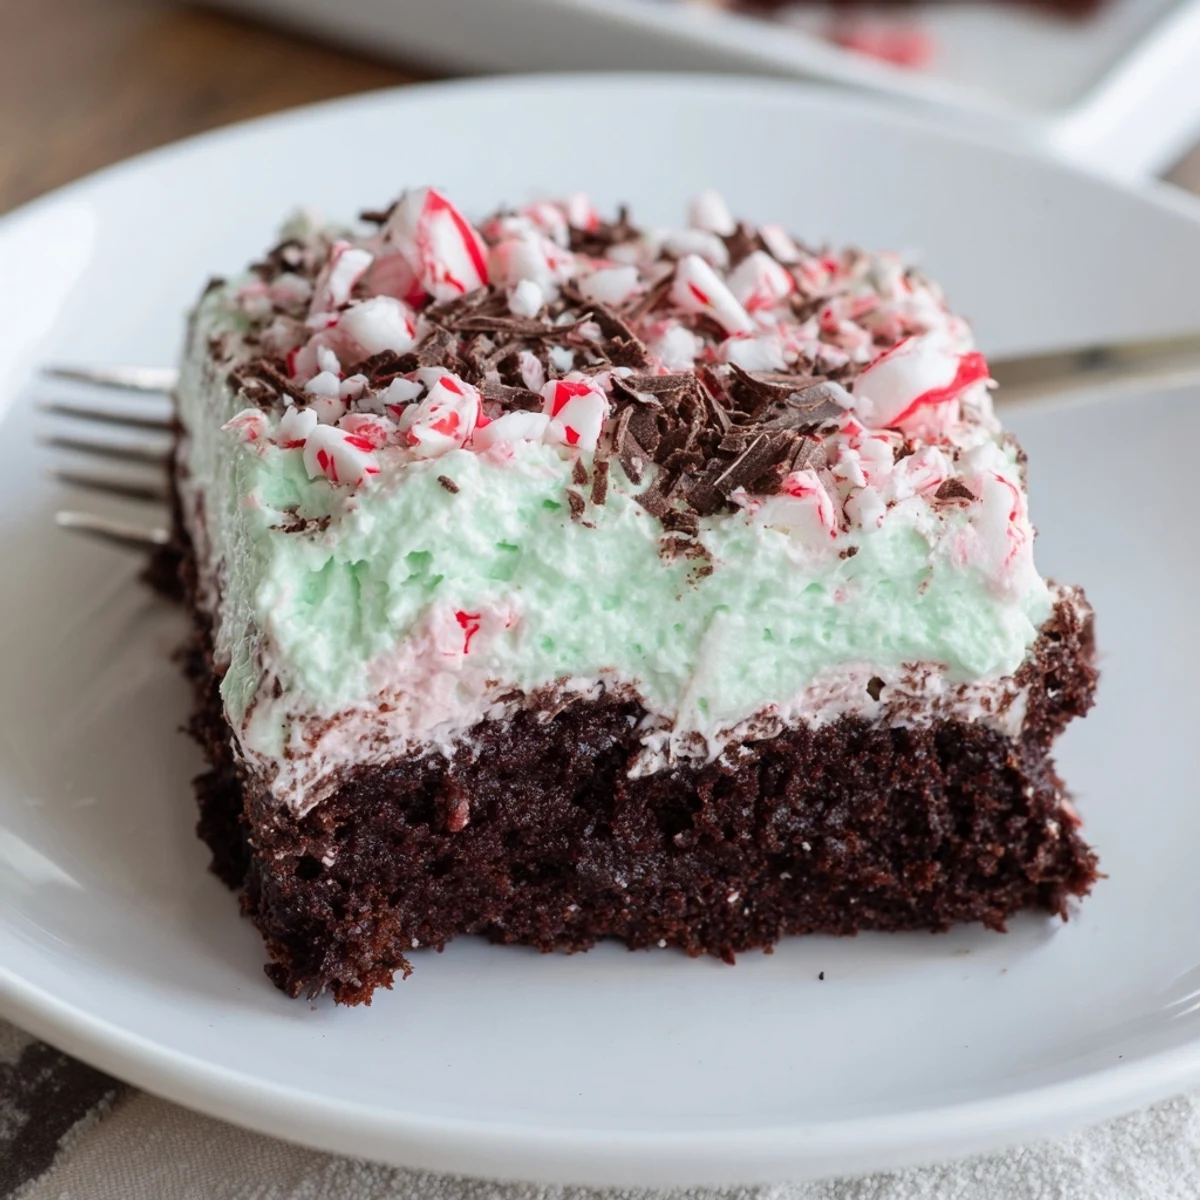
 This chocolate poke cake is baked, cooled, then evenly pierced so a mint-infused vanilla pudding can soak into the crumb. After chilling to set, a fluffy whipped topping is spread and the surface is scattered with crushed peppermint candies and optional chocolate shavings. Ready in about 2 hours with 25 minutes hands-on time; serves 12 and keeps best chilled for up to two days.
Last winter when the weather turned mischievously cold, my kitchen filled with the scent of peppermint and chocolate thanks to a playful experiment: the Peppermint Poke Cake. There’s something unexpectedly joyful about poking warm cake and watching silky pudding settle into every nook. I remember being skeptical about the pudding soaking through, but the first slice was gorgeously marbled and deliciously cool. That little bit of theatrical drama made it an instant crowd-pleaser at my get-together.
The first time I made this cake, my nephew insisted on pressing the peppermint candies with a rolling pin, giggling as the pieces ricocheted across the counter. That noisy, minty chaos set the spirit for our holiday brunch that year—we kept sneaking spoonfuls of whipped topping before the rest made it onto the cake. The leftover crumbs the next morning were proof that the cake was a hit. It’s now our most mischievous tradition.
Ingredients
- Chocolate cake mix: The foundation for the cake; use a high-quality mix for deep chocolate flavor and make sure to sift out any lumps for best texture.
- Eggs: Bring them to room temperature for a cakier crumb and smooth mixing.
- Water: Stick to cold water; swapping for coffee intensifies chocolate but classic water keeps it light and lets the mint shine.
- Vegetable oil: Provides unbeatable moisture; don’t over-measure or it can turn greasy after chilling.
- Instant vanilla pudding mix: The magic layer—be sure to use instant, not cook-and-serve, or the texture won’t set properly.
- Milk: Whole or 2% gives the filling creaminess, but I once used almond milk and the pudding still worked, just set a little softer.
- Peppermint extract: Just a teaspoon gives the pudding its refreshing kick—too much and it’ll taste like toothpaste, so measure carefully.
- Red or pink food coloring: Optional, but those pretty streaks add a wow factor to each slice.
- Whipped topping: Thawed fully before spreading; keep it cold until you’re ready to use for easy swooping.
- Crushed peppermint candies: For a festive crunch, but bash gently so you have a nice mix of rubble and dust.
- Chocolate shavings or mini chocolate chips: Totally optional but adds a bit of dreamy flair on top—I prefer shavings for a grown-up look.
Instructions
- Bake the cake:
- Preheat the oven to 350°F and swirl your cake mix, eggs, water, and oil in a large bowl until glossy and lump-free. Pour neatly into your greased pan, smooth the top, and enjoy that chocolate aroma as it bakes for about 30 minutes.
- Cool and poke:
- Let the cake rest for 10 to 15 minutes so it firms up but is still warm, then use the end of a wooden spoon to dot holes evenly across the surface—don’t be shy: more holes mean more pudding!
- Prepare the pudding:
- Whisk pudding mix, milk, peppermint extract, and a few drops of food coloring until silky and just starting to thicken—about 2 minutes of muscle.
- Pudding pour:
- Right as the pudding thickens, pour it over the cake and gently coax it into the holes with a spatula, making sure it gets into every sunken patch.
- Chill:
- Cover the pan and chill in the fridge for at least 1 hour; the cake will firm up and absorb all that cool, minty filling.
- Top and decorate:
- Swoop the whipped topping across the chilled cake, scatter with crushed peppermint candies and chocolate shavings, then marvel at your festive creation.
- Slice:
- Use a serrated knife to reveal the pink and chocolate layers—best served cold for a refreshing bite.
 Pin It
 The quietest compliment came when my mom asked for seconds after insisting she “wasn’t much for desserts.” I realized then that sometimes a playful cake can soften even the most reserved guests, turning dessert into a moment worth remembering.
How to Crush Candies Without Mess
Wrap peppermint candies in a zip-top bag, and use a rolling pin or heavy pan to break them up right on the countertop. Short, firm taps work best—avoid smashing, or you’ll end up with sticky powder everywhere. Any leftover bits can be saved as sweet stir-ins for hot cocoa the next day.
Make-Ahead and Storage Success
This cake loves the fridge; it’s at its fluffiest and most flavorful chilled overnight. If making ahead, wait to garnish with candies until just before serving, so they stay crunchy and bright. Cover with plastic wrap and enjoy within two days for the freshest taste.
Swapping and Customizing for Every Occasion
Over the years, I’ve swapped chocolate cake for red velvet for Valentine’s Day and sprinkled heart-shaped sprinkles instead of peppermint. Mini chocolate chips never hurt, and lemon pudding with lemon extract creates a surprisingly summery treat.
- Always taste your pudding filling for balance—it should be boldly minty but still sweet.
- Feel free to use sugar-free or allergy-friendly mixes to suit your crowd.
- Slice straight from the fridge for the sharpest lines and prettiest cross-sections.
 Pin It
 Sharing a slice of this Peppermint Poke Cake feels like passing along a little bit of celebration. Here’s to more festive baking and those unexpected sweet moments around the table.
Recipe Questions & Answers
- → Can I boost the mint flavor further?
-
Yes. Add an extra 1/8–1/4 teaspoon peppermint extract to the pudding or a scant 1/4 teaspoon to the cake batter for a more pronounced mint profile. Taste carefully—peppermint extract is potent.
- → How long should it chill before serving?
-
Chill at least 1 hour so the pudding sets and flavors meld. For best texture and easier slicing, refrigerate 2 hours or overnight; just cover to prevent drying.
- → What can I use instead of frozen whipped topping?
-
Stabilized whipped cream (heavy cream whipped with a bit of powdered sugar and cream of tartar) or a mascarpone-based spread work well as alternatives and provide similar creaminess.
- → How do I adjust for a different cake base?
-
Swap the chocolate mix for white or red velvet for a lighter or festive look. Baking time may vary slightly; test doneness with a toothpick and adjust pouch instructions as needed.
- → Can this be prepared ahead for a gathering?
-
Yes. Assemble and chill up to a day ahead, then add crushed peppermint and chocolate shavings just before serving to keep toppings crisp.
- → Any tips for preventing a soggy crust?
-
Allow the cake to cool 10–15 minutes before poking and pouring the pudding so the surface sets slightly. Push pudding gently into holes rather than pressing hard to keep the edges intact.
