 Pin It
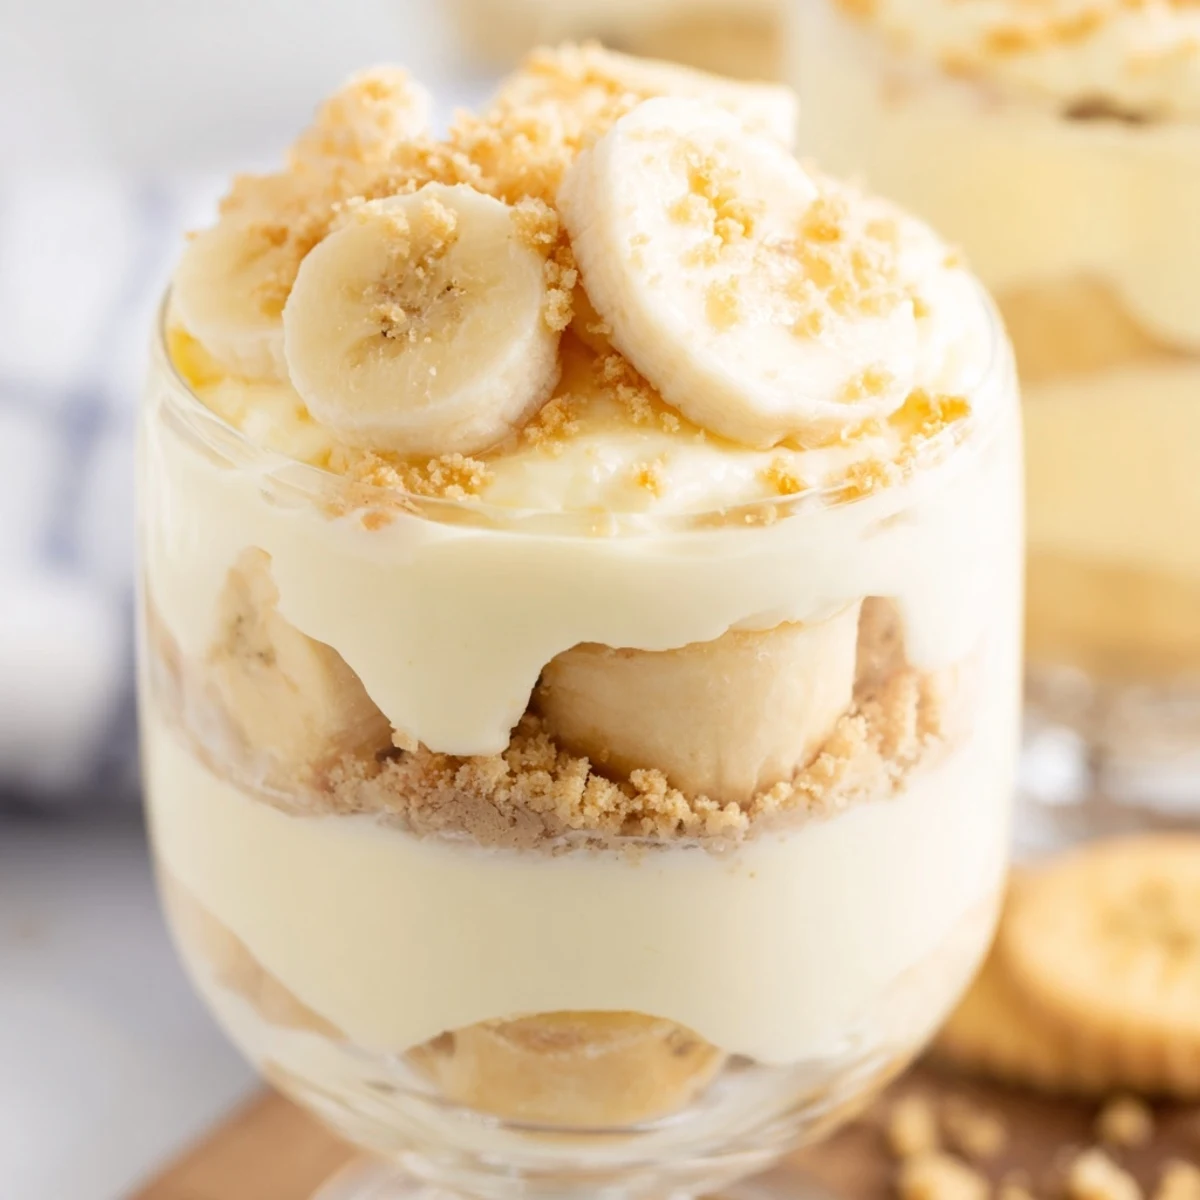
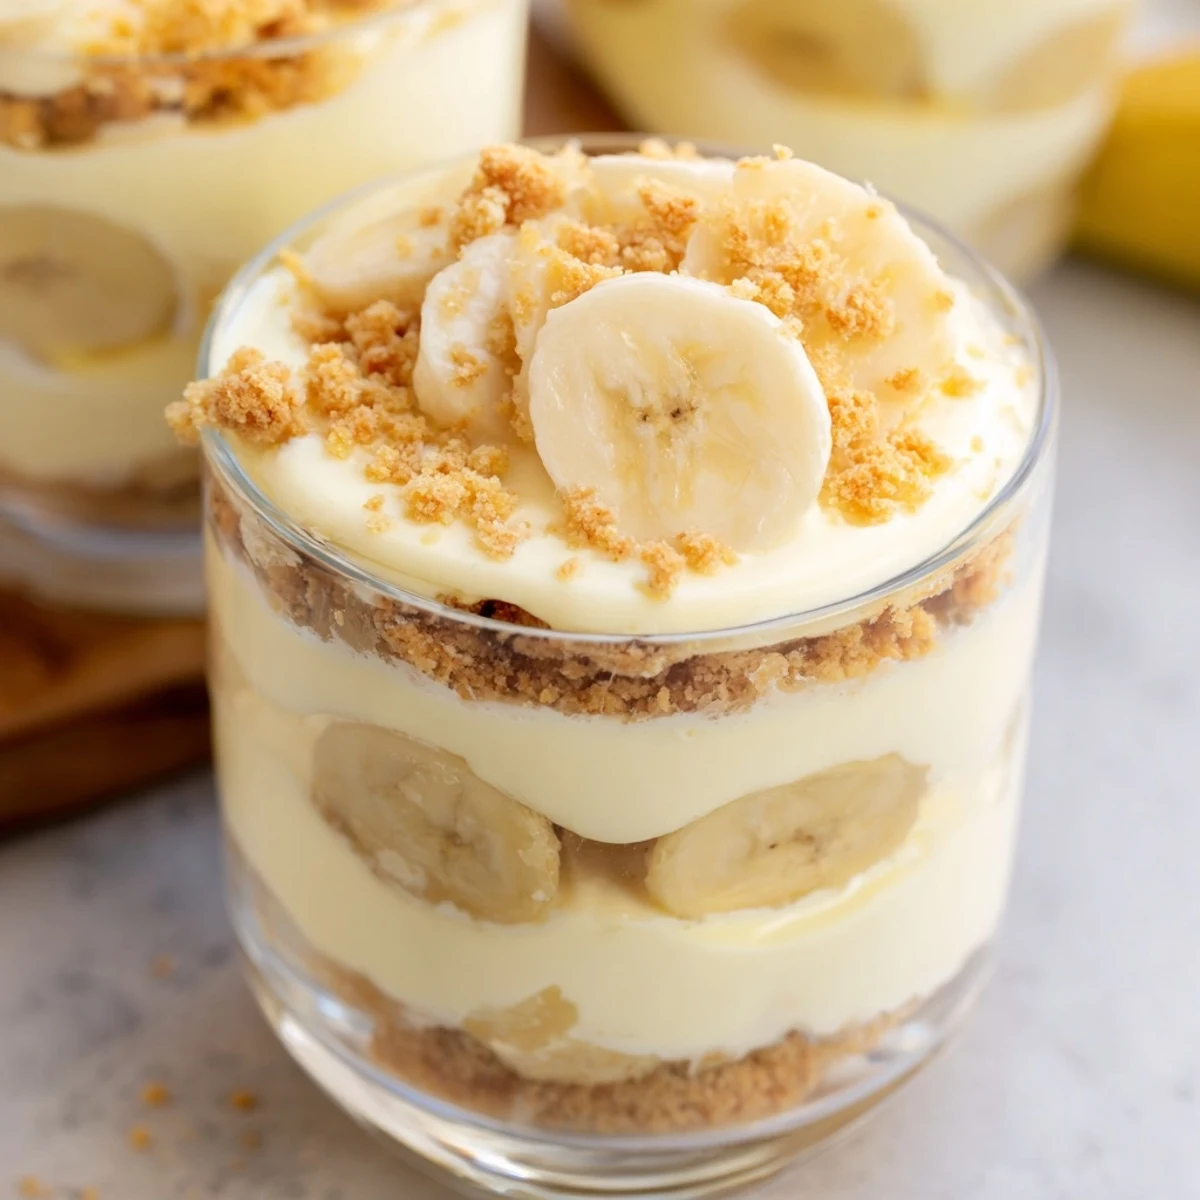
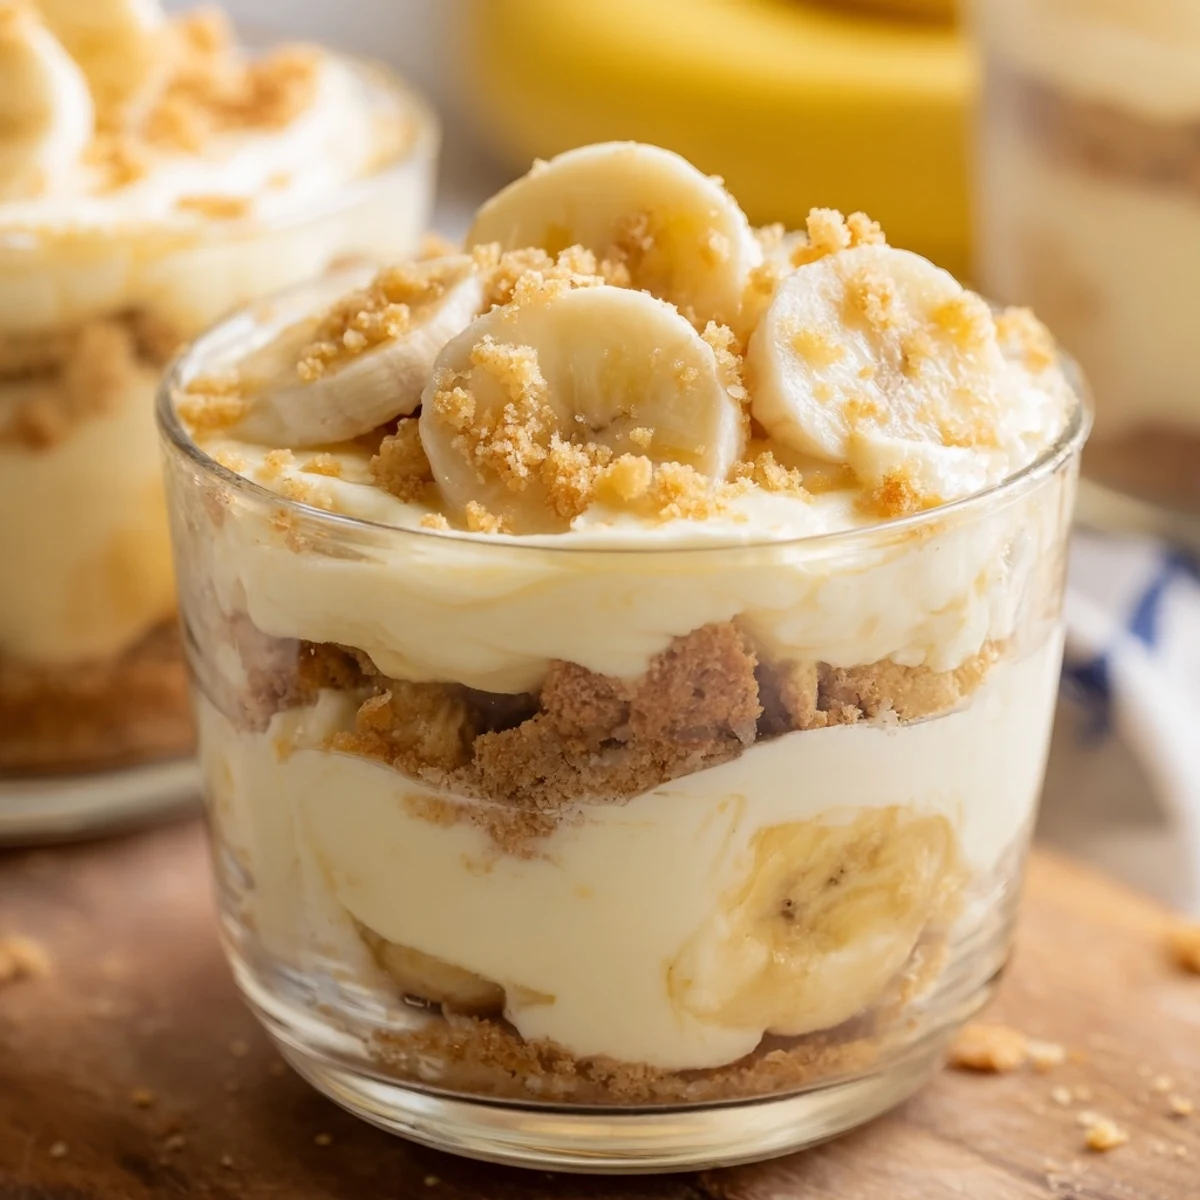
 These individual no-bake cups combine the best of both worlds—velvety cheesecake filling and classic banana pudding layered over a buttery vanilla wafer crust. Each cup features alternating layers of creamy cheesecake mixture, fresh sliced bananas, and thickened banana pudding, all finished with a generous topping of crunchy wafer crumbs and more fresh banana slices. The entire assembly comes together in just 20 minutes with no oven required, making these cups an ideal make-ahead dessert for parties, potlucks, or weeknight treats. After chilling for at least two hours, the layers set into perfect, spoonable portions that balance sweet banana flavor with rich creaminess and satisfying crunch from the cookie crumble topping.
My youngest daughter stumbled into the kitchen last summer clutching a bunch of overripe bananas, demanding we make something fun. We had cream cheese sitting on the counter from a bagel experiment that morning, and somewhere between her persistence and the humidity making everything feel lazy and sweet, these cups happened. She licked the mixing bowl clean and declared them better than any restaurant dessert.
Last summer I made these for a neighborhood potluck when I completely forgot about my dessert contribution until two hours before everyone arrived. My neighbor Karen asked for the recipe three times, and now theyre requested at every gathering. Theres something about individual portions that makes people feel special, like you made something just for them.
Ingredients
- Vanilla wafer cookies: The classic Nilla wafers work beautifully here, crushing them creates that nostalgic crunch everyone remembers from childhood
- Unsalted butter: Melted just enough to bind the crumbs together without making them soggy
- Cream cheese: Must be truly softened to room temperature or you will have lumps in your cheesecake layer
- Heavy whipping cream: Cold straight from the refrigerator is essential for achieving those stiff peaks that lighten the filling
- Instant banana pudding mix: The instant version works perfectly here and saves you from cooking a custard base
- Ripe bananas: Look for bananas with plenty of brown spots but not completely black for the best flavor
Instructions
- Build the crust foundation:
- Crush your vanilla wafers until they resemble coarse sand, then stir in melted butter until every crumb is coated. Spoon two tablespoons into each cup and press down gently with the back of a spoon to create a firm base that will hold all those creamy layers.
- Whip the cheesecake filling:
- Beat your softened cream cheese with sugar and vanilla until completely smooth, scraping down the bowl to catch any pockets. In a separate bowl, whip your cold heavy cream until stiff peaks form, then fold it gently into the cream cheese mixture until no white streaks remain.
- Prepare the banana pudding:
- Whisk the instant pudding mix with cold milk for exactly two minutes until it thickens nicely. Do not overmix or the pudding might become too stiff to layer smoothly.
- Layer everything beautifully:
- Start with half your cheesecake filling over each crust, add a circle of fresh banana slices, then spoon the banana pudding on top. Finish with the remaining cheesecake mixture, creating those distinct stripes that make these cups so impressive.
- Add the finishing touches:
- Sprinkle extra crushed wafers over each cup, add a few more banana slices for that fresh pop, and add a dollop of whipped cream if you are feeling fancy. Cover and refrigerate for at least two hours so all the flavors can mingle and the layers can set properly.
 Pin It
 My grandmother never measured anything when she made banana pudding, somehow knowing exactly how much custard was needed by looking at the size of her banana bunch. These cups remind me of her kitchen, where precision mattered less than instinct and love was the secret ingredient in everything.
Making Ahead
You can assemble these cups up to 24 hours in advance, which makes them perfect for dinner parties or holiday gatherings. Keep them covered in the refrigerator but wait to add the fresh banana toppings until about 30 minutes before serving to keep them from oxidizing.
Serving Suggestions
Clear glass cups or mason jars show off those beautiful layers and make these desserts feel extra special. Small espresso cups work perfectly if you want bite sized portions for a large crowd.
Flavor Variations
A pinch of cinnamon in the crust adds warmth that pairs surprisingly well with the banana flavor. Try swapping half the vanilla wafers for graham crackers if you want a more traditional cheesecake base.
- Drizzle some salted caramel over the top for an indulgent twist
- Add a layer of chocolate ganache between the cheesecake and pudding
- Crush a few extra wafers over each serving right before enjoying
 Pin It
 There is something deeply satisfying about desserts that require no oven time, especially during those sweltering summer months when turning on the stove feels like a personal betrayal. These cups have become my go to answer whenever anyone asks what sweet thing we can have without heating up the whole house.
Recipe Questions & Answers
- → Can I make these cups ahead of time?
-
Yes, these cups can be prepared up to 24 hours in advance. Assemble all layers except the fresh banana topping, cover tightly, and refrigerate. Add fresh banana slices and whipped cream just before serving to prevent browning and maintain optimal texture.
- → What type of cups work best for serving?
-
Clear glass dessert cups, mason jars, or small parfait glasses work beautifully as they allow you to see the distinct layers. Each serving vessel should hold approximately 6-8 ounces to accommodate all three layers comfortably without overflowing.
- → How do I prevent bananas from turning brown?
-
Toss sliced bananas lightly in lemon juice before layering them into the cups. This simple step prevents oxidation and browning while maintaining the fresh banana flavor. Alternatively, add banana slices just before serving for the freshest appearance.
- → Can I use homemade pudding instead of instant mix?
-
While instant pudding mix provides convenience and sets quickly for distinct layers, you can substitute homemade vanilla pudding infused with fresh banana. However, ensure the homemade mixture is thoroughly chilled and thickened before layering to maintain proper structure.
- → What's the best way to crush vanilla wafers evenly?
-
Place vanilla wafer cookies in a sealed plastic bag and use a rolling pin to crush them into fine, uniform crumbs. Alternatively, pulse them briefly in a food processor for consistent texture. The crumbs should be fine enough to press into a compact crust but retain slight texture for crunch.
- → Can I substitute the vanilla wafers in the crust?
-
Vanilla wafers provide classic flavor, but graham cracker crumbs, Nilla wafers, or even buttery shortbread cookies work as delicious alternatives. Each option maintains the essential crunch and buttery base needed to support the creamy layers above.
