 Pin It
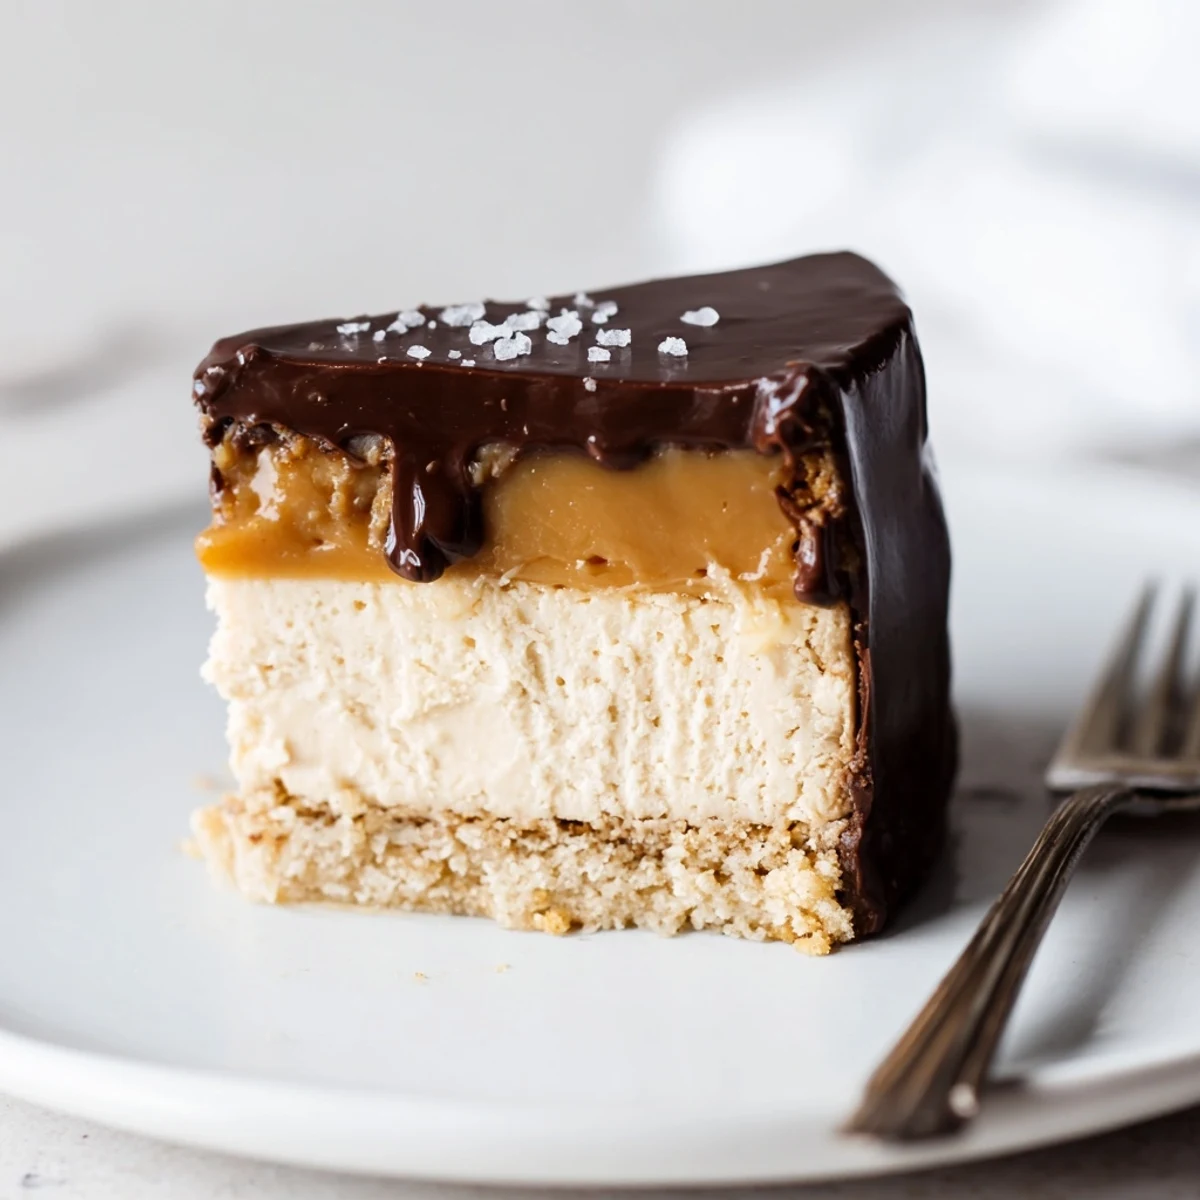
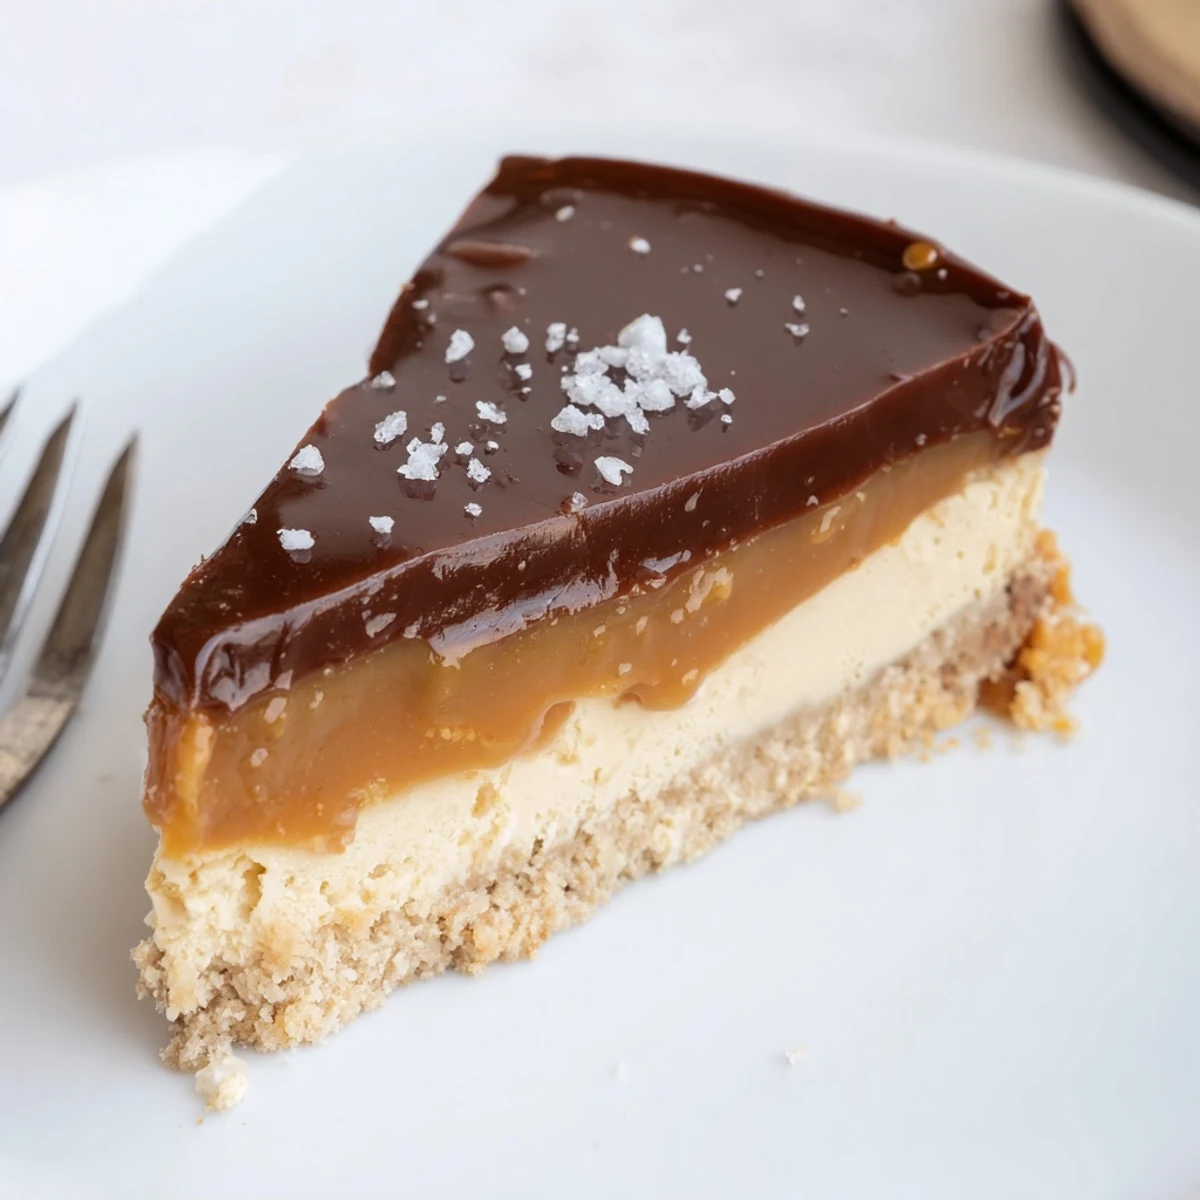
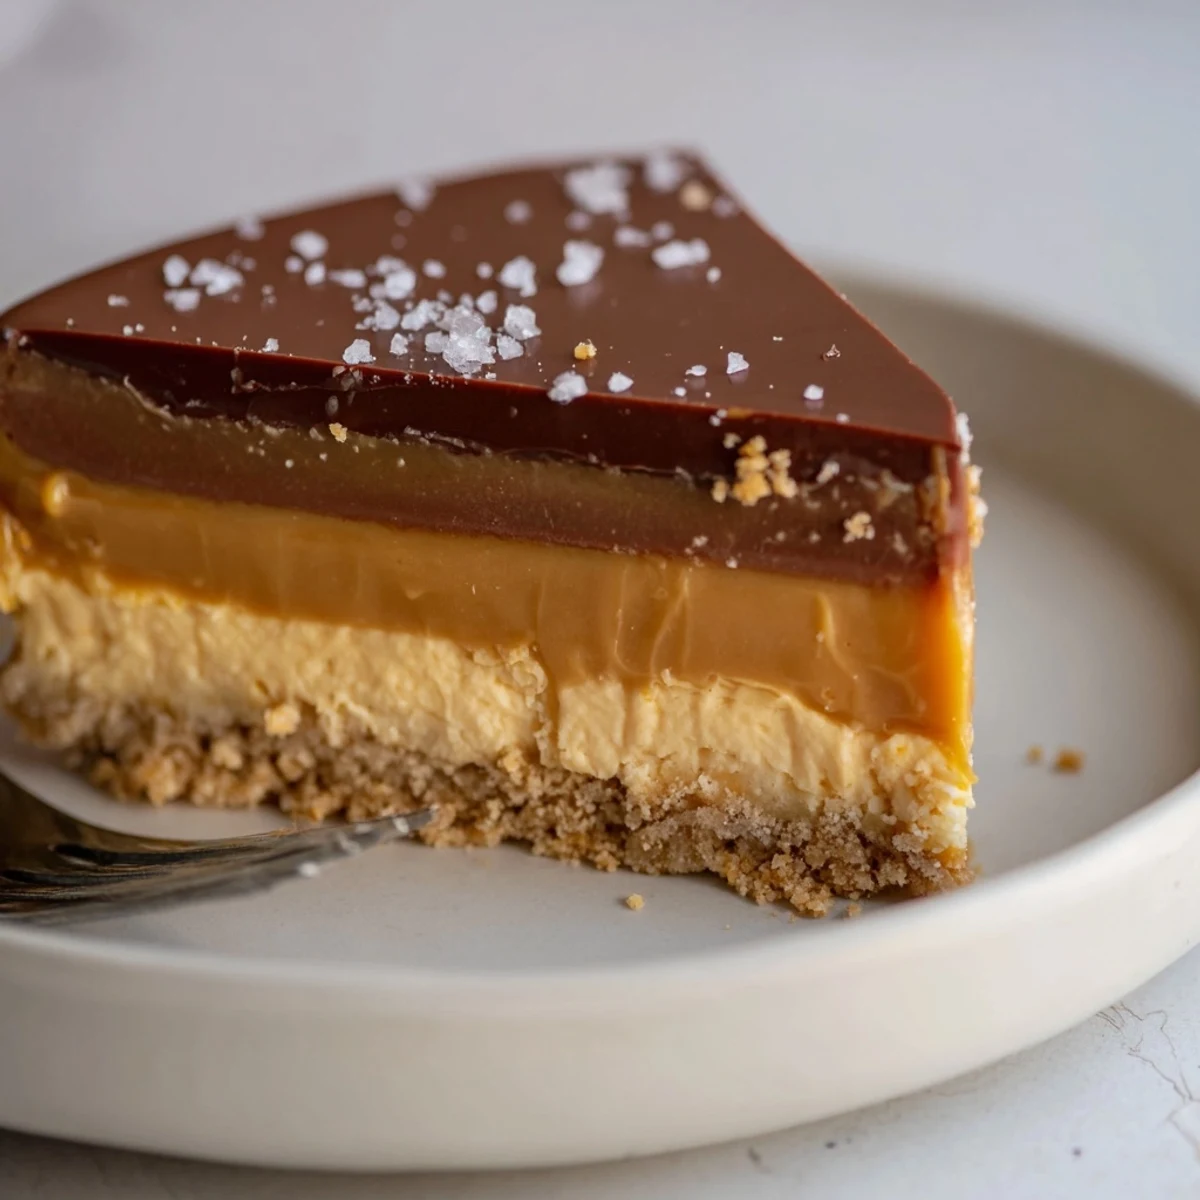
 This ultra-indulgent Millionaire cheesecake layers a crisp buttery biscuit base with silky salted caramel, a light but creamy cream cheese filling folded with whipped cream, and a glossy dark chocolate ganache. Key steps: press and chill the base, cook caramel until thick and caramelized, cool before topping, gently fold for a smooth filling, and pour warm ganache for a mirror finish. Chill thoroughly before slicing.
The first time I made this millionaire cheesecake, my kitchen was filled with the scent of melting butter and the gentle hum of the mixer. I wasn&apost out to impress anyone—mostly just trying to see if I could really pull off such a decadent dessert without it sliding into a sugary mess. Each step felt like a mini celebration as the layers built up and the anticipation (and, I admit, a touch of nervousness) grew. When I finally sliced into it, that satisfying "thunk" of the knife hitting the base was all the encouragement I needed for a second slice.
I once brought this cheesecake to a family BBQ, and the cousins barely let it finish chilling before they were circling the fridge. We all hovered around the kitchen island, sneaking peeks at the layers coming together and joking about who would get the biggest slice. That afternoon ended with sticky fingers and a chorus of "who made this again?"—even from those who usually skip dessert. It was the laughter and caramel smudges on the plates that made it feel like a proper celebration.
Ingredients
- Digestive biscuits (or graham crackers): Crushing these by hand leaves some texture, which gives the base a bit of crunch and homeyness.
- Unsalted butter: Melting the butter fully helps everything hold together tightly at the bottom of your tin.
- Light brown sugar: Adds a mellow caramel note and helps the base set up sweet and sturdy.
- Sweetened condensed milk: The foundation for that dreamy caramel, it thickens up beautifully with a little patience.
- Golden syrup: This is the secret to a rich, chewy caramel that doesn&apost crystallize on you.
- Full-fat cream cheese: Go for full-fat if you want your cheesecake layer luxuriously smooth and rich.
- Double cream (or heavy cream): Lightly whipped, it turns the cheesecake filling light as a cloud but still decadent.
- Vanilla extract: Even a teaspoon brings out the best in the other layers.
- Dark chocolate: Using at least 55% cocoa keeps the ganache topping bittersweet and balanced, not cloying.
Instructions
- Build the Biscuit Base:
- Line your springform tin and crush the biscuits—let the sound and smell remind you of campfire s'mores. Mix the crumbs with melted butter and brown sugar, then press until it feels solid under your palm. Chill it to firm up.
- Brew the Caramel:
- In your saucepan, melt butter with brown sugar and golden syrup, stirring until it looks molten and smells heavenly. Gradually add the condensed milk and cook, stirring constantly, until you see a golden glow and feel it thicken, then add a sprinkle of sea salt for depth.
- Compose the Cheesecake:
- With your mixer, blend the cream cheese and sugar until glossy, then gently fold in the whipped cream and vanilla. Layer it carefully over the set caramel using a spatula—the fluff should glide smoothly as you work.
- Gloss with Chocolate Ganache:
- Heat your cream until wisps of steam appear, then pour over the chopped chocolate. Stir in the butter and swirl until glossy, then pour over your cheesecake, letting the ribbons even out on their own. Chill so it sets into a shiny shell.
- Slice and Serve:
- Run a warm knife around the tin for a clean release, then slice with care so every piece shows off those perfectly stacked layers.
 Pin It
 One evening, when friends showed up unannounced, I pulled this cheesecake from the fridge, and suddenly we were all sitting cross-legged on the floor, sharing stories between forkfuls. Maybe it was the chocolate, or maybe just the occasion, but the conversation lingered as long as the last crumbs on the plate. That night, dessert turned into a memory.
Making the Most of Leftovers
If, by some miracle, you have leftovers, refrigerate them in an airtight container—although I've noticed people tend to "sneak" extra slices. The flavors deepen and the layers stay distinct even a day or two later. Sometimes I break off a chilled piece for breakfast (no regrets).
How to Get the Cleanest Slices
Dip your knife in hot water and wipe it dry before each cut—this trick makes those layered slices look bakery-perfect. Don&apost rush the process or you risk merging the caramel and cream cheese layers. Trust me, patience pays off with those crisp, photogenic edges.
Customization for Fun or Allergies
This cheesecake forgives experiments: swap in gluten-free biscuits or play with the chocolate mix in the ganache. Add a crack of salt on top if you love sweet with a wink of savory. Try fresh berries on the side or a splash of espresso in the filling for an adult twist.
- Let the caramel cool slightly so it doesn&apost melt the cheesecake layer.
- Don&apost be afraid to adjust the chocolate blend for your own taste.
- Always double-check labels if serving anyone with allergies.
 Pin It
 Give this recipe a try the next time you want dessert to be the star of the show—or just because you deserve something truly special. I promise, whatever the occasion, there won&apost be leftovers for long.
Recipe Questions & Answers
- → How do I get a firm biscuit base?
-
Crush the biscuits to fine crumbs, mix thoroughly with melted butter and press firmly into the tin. Chill for at least 20 minutes to set before adding the next layer.
- → How can I tell when the caramel is ready?
-
Cook the condensed milk, butter and sugar until the mixture thickens, darkens slightly and coats the back of a spoon. It should be pourable but hold its shape when cooled.
- → Any tips to keep the filling silky and light?
-
Beat cream cheese until smooth, then fold in softly whipped cream to retain air. Avoid overmixing to prevent a dense texture.
- → How do I achieve a glossy ganache?
-
Heat cream until steaming, pour over chopped chocolate and let sit 1–2 minutes before stirring. Add a knob of butter for shine and stir until smooth; cool slightly before pouring.
- → Can I make this gluten-free?
-
Yes — substitute gluten-free digestive biscuits or gluten-free graham crackers for the base and check all packaged ingredients for cross-contamination warnings.
- → How should I store and serve it?
-
Chill the assembled cake for several hours or overnight. Store in the fridge covered; remove 10–15 minutes before serving for cleaner slices and better mouthfeel.
