 Pin It
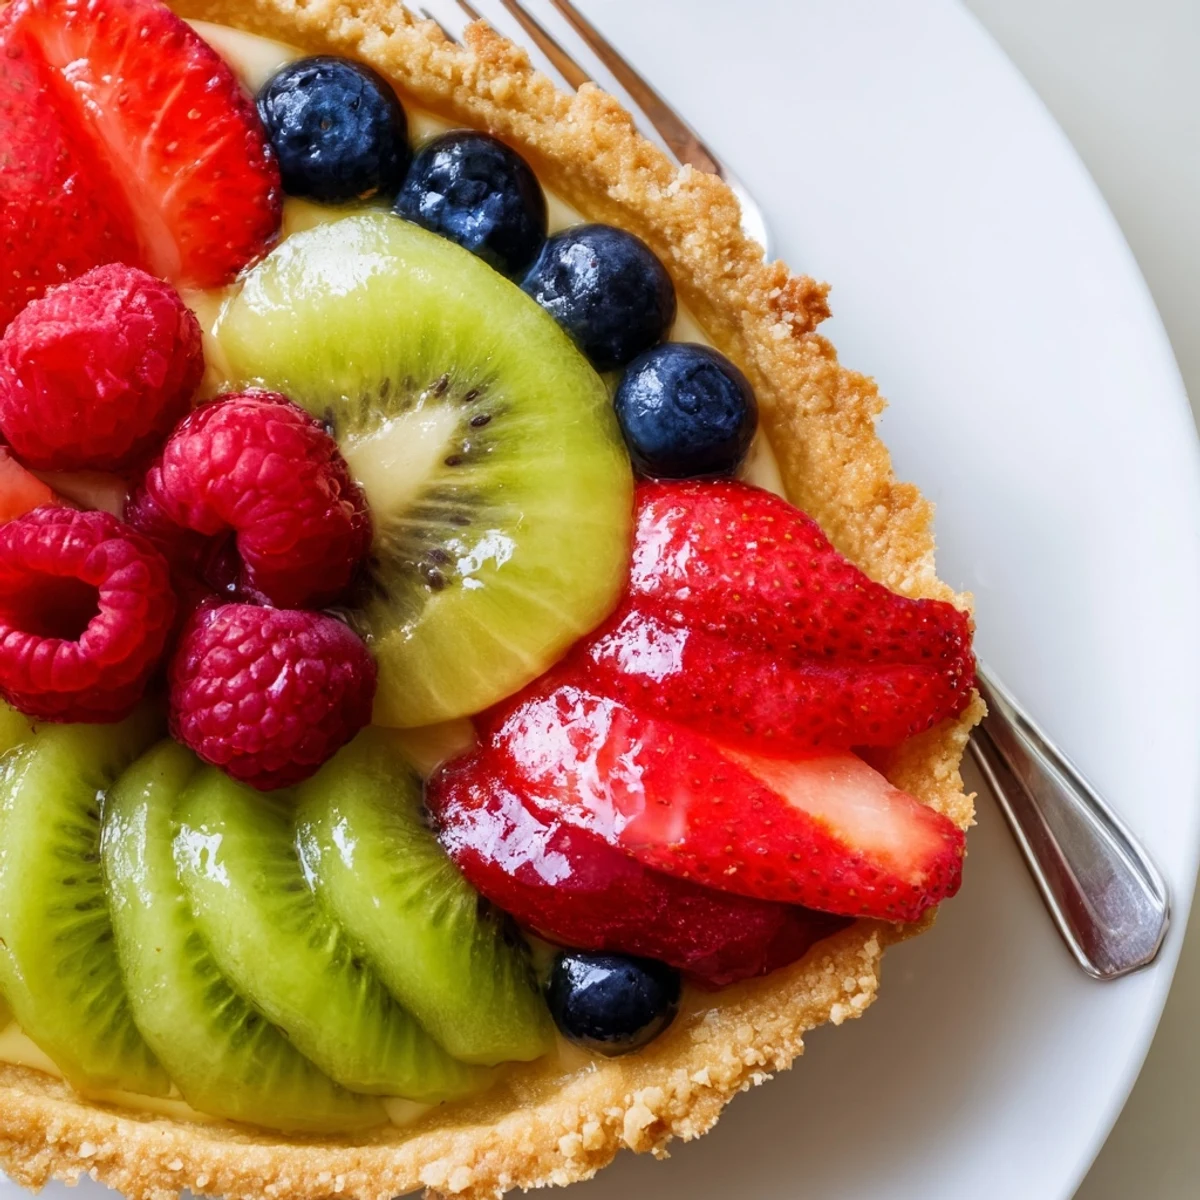
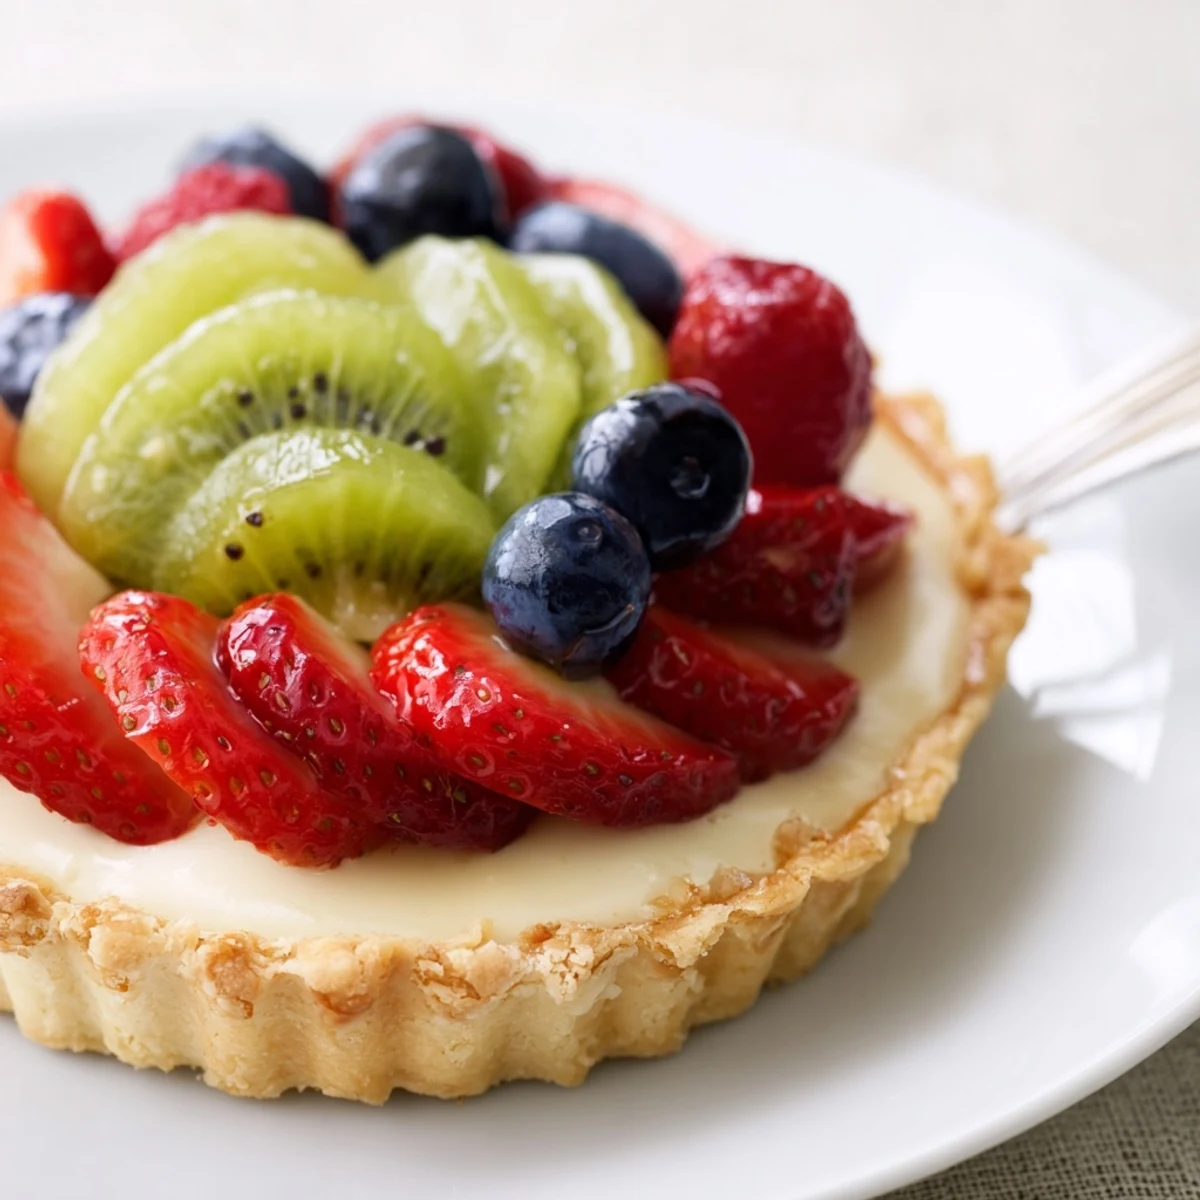
 This French-inspired tart combines a crisp, buttery shell with a smooth mascarpone and softly whipped cream filling. After blind-baking and cooling the crust, the filling is spread evenly, sliced strawberries, blueberries, kiwi and raspberries are arranged decoratively, and a warmed apricot glaze can be brushed over the fruit for shine. Chill at least 30 minutes to set; slice and serve chilled for best texture and balance.
There was a particular Sunday when I found myself craving something that sparkled with the colors of summer, and this fruit tart with mascarpone was the answer I didn't know I needed. The kitchen filled with the gentle scent of baking butter, and an unexpected calm settled in while I sliced the fruit and swirled the filling. It was less about careful precision and more about playful arranging—almost like painting, except every brushstroke was something I could sneak a taste of. Sharing slices later, each forkful reminded me that a little extra effort can turn a routine dessert into something special.
Last spring, I whipped up this tart during a family brunch, and mid-assembly my nephew insisted on placing all the kiwi pieces himself—he called them green suns. It didn’t look like it belonged on a magazine cover, but everyone went silent as they took the first bite. That little moment of fruit arranging stuck with us, and no one seemed to mind the lopsided pattern. Now, I always invite a little creative chaos when we make it together.
Ingredients
- All-purpose flour: This sets the tart's structure; gentle handling helps keep the crust tender.
- Unsalted butter: Chill your cubes thoroughly—this is how you get layers that crisp up beautifully.
- Granulated sugar: Adds just enough sweetness to let the fruit shine.
- Egg yolk: Brings richness and binds the dough, so the crust doesn’t crumble as you slice.
- Cold water: Add it slowly until the dough just comes together; too much and you’ll lose flakiness.
- Salt: The smallest pinch sharpens all those buttery notes.
- Mascarpone cheese: Room temperature mascarpone is silky-smooth and folds effortlessly with whipped cream.
- Heavy cream: A quick whip makes the filling light as a cloud, with just the right amount of body.
- Powdered sugar: Blends without graininess, giving the mascarpone mixture a delicate sweetness.
- Vanilla extract: A dash deepens flavor and ties the whole tart together.
- Lemon zest (optional): I find it brightens up the creamy filling, especially when other fruits are on the tart side.
- Strawberries, blueberries, kiwi, raspberries: Pick whatever looks most vibrant at the market; the colors and flavors are half the fun.
- Apricot jam and water (for glaze): This is the magic trick for a glossy fruit finish but totally optional if you prefer your tart rustic.
Instructions
- Get Ready:
- Preheat your oven to 350°F (175°C) and grease the tart pan, pausing for a moment to appreciate anticipation building.
- Make the Crust:
- Work the butter into the flour with your fingertips until the mixture feels like sandy crumbs, careful not to let the warmth of your hands melt it away.
- Form and Chill Dough:
- Toss in egg yolk and add water a little at a time; stop when it just holds together, then press it into the pan and chill for 20 minutes while you sample some berries.
- Blind Bake:
- Lay parchment paper over the dough, pour in pie weights or beans, and bake until the crust turns golden and makes the kitchen smell like warm biscuits; remove the weights halfway through.
- Cool and Prepare Filling:
- Once the crust is cool, whisk together mascarpone, powdered sugar, vanilla, and lemon zest; then gently fold in clouds of whipped cream for a creamy base.
- Fill the Shell:
- Spread the mascarpone mixture into the tart shell, smoothing it out with the back of a spoon or spatula for that instant satisfaction.
- Fruit Arrangement:
- Layer strawberry slices, blueberry handfuls, kiwi wheels, or whatever catches your fancy, arranging until every space buzzes with color.
- Gloss the Top:
- To finish, melt apricot jam with a splash of water and brush it gently over the fruit; watch the tart transform as the glaze catches the light.
- Chill and Serve:
- Let the assembled tart rest in the fridge for at least half an hour, resisting the urge to cut in right away; once set, slice and enjoy every luscious bite.
 Pin It
 It’s funny how this tart takes on a starring role at celebrations—someone always insists on taking a picture just before slicing in, and the table buzzes with excitement. The best part is watching the fruit disappear one vibrant piece at a time, proof that a simple homemade tart can turn a regular afternoon into a memory.
Making the Most of Fresh Fruit
The way the fruit is sliced and laid out can really transform the tart from charmingly rustic to showstopper chic. Letting each piece shine, especially when you embrace the wonky edges and uneven slices, always feels more welcoming than striving for perfection. Sometimes, a drizzle of passion fruit or a scattering of chopped mint adds another layer of personality. If you can, choose fruit when it’s just ripe—firm enough to hold its shape but bursting with juice.
Mastering That Buttery Crust
I've found that keeping every crust ingredient as cold as possible is my not-so-secret weapon for that shattering snap when you cut in. If you ever notice butter melting on your fingers as you work, a quick pause in the fridge gives the dough a fighting chance. Even slightly overbaking is kinder to texture than underbaking, which gives you a pale, bland base. In a pinch, pricking the bottom with a fork before baking helps prevent those noisy bubbles from forming.
Simple Swaps and Unexpected Twists
Some days I swap in blackberries or peaches, or stir a splash of almond extract into the mascarpone for warmth. If the mood strikes, a layer of dark chocolate brushed on the crust feels quietly luxurious beneath the bright fruit. Sometimes, I scatter some toasted nuts over the top for crunch or add edible flowers when I want to impress.
- Let the tart come to room temp for 10 minutes before slicing for best texture.
- Always taste your fruit before arranging—sweeten tart varieties with a sprinkle of sugar if needed.
- Leftovers are delicious the next day but the crust is best fresh.
 Pin It
 There’s something deeply satisfying about crafting this tart for people you love, and every new batch is a blank canvas. When fruit is at its peak, this simple dessert really does taste like celebration on a plate.
Recipe Questions & Answers
- → How do I prevent a soggy crust?
-
Blind-bake the crust with parchment and weights until golden, then cool fully. For extra protection, brush a thin layer of melted chocolate or warmed jam on the cooled shell before adding the filling.
- → Can I substitute mascarpone?
-
Use full-fat cream cheese softened and mixed with a touch of heavy cream and vanilla for a similar richness, or blend ricotta smooth for a lighter option; adjust sweetness to taste.
- → What’s the best way to glaze the fruit?
-
Warm apricot jam with a splash of water until fluid, strain if needed, and gently brush over the fruit for an even, glossy finish that also helps preserve color.
- → How far ahead can I assemble the tart?
-
Assemble and glaze the tart a few hours ahead and keep chilled; for best texture, add delicate berries like raspberries just before serving. Fully assembled, it keeps 24 hours refrigerated.
- → Any blind-baking tips for even doneness?
-
Press dough evenly into the pan, chill before baking, line with parchment and use baking beans to hold shape. Remove weights halfway through baking to help the bottom finish browning.
- → What wines pair well with this tart?
-
Light, effervescent wines such as Moscato d'Asti or a dry Champagne complement the creamy filling and bright fruit without overpowering delicate flavors.
