 Pin It
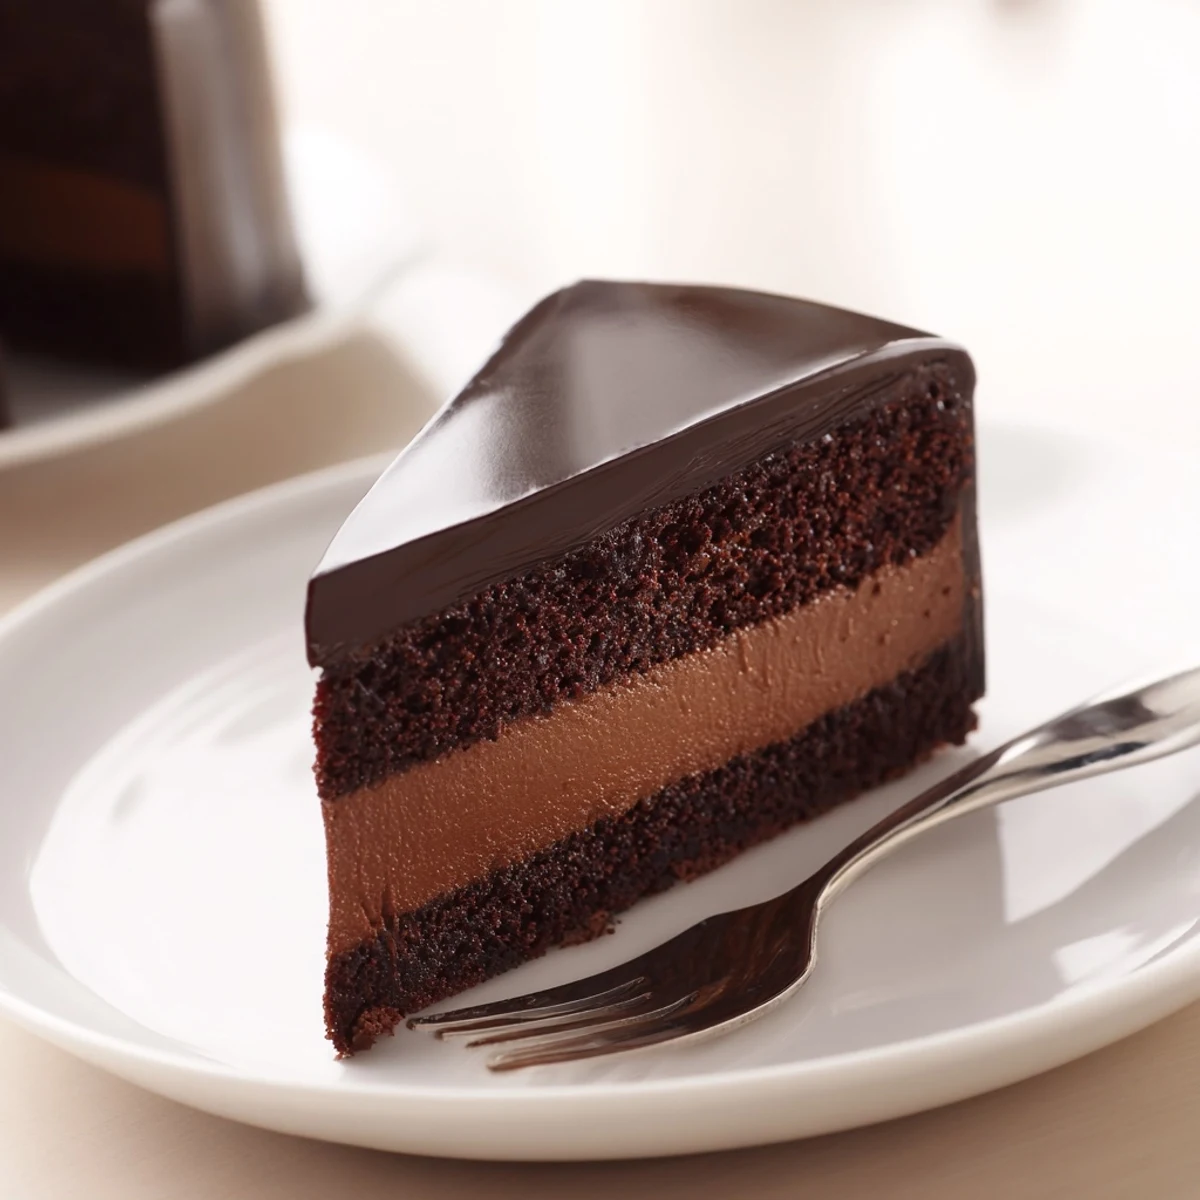
 This stunning French dessert features three luxurious components: a tender chocolate sponge base, an exceptionally silky dark chocolate mousse layer, and a mirror-like chocolate glaze. The mousse achieves its airy texture through whipped cream folded into a rich chocolate and egg yolk mixture. After assembling and chilling for four hours to set, the final glaze creates that professional patisserie finish. Perfect for dinner parties or special celebrations, this dessert delivers intense chocolate flavor in every spoonful.
The winter I turned twenty-seven, my tiny apartment kitchen became an accidental chocolate laboratory. Between February and March, I must have made eight different versions of this mousse cake, learning that patience matters more than precision when it comes to achieving that perfect glossy finish. My roommate stopped asking what was for dessert and started setting out plates before I even announced I was baking.
I brought this to my friends anniversary dinner last spring, intending it to be the grand finale after weeks of planning. The moment I cut into that first slice and the glaze cracked just so, revealing the dark layers beneath, the entire table went quiet before erupting into the kind of enthusiastic praise that makes your cheeks warm. Now they request it for every celebration, no matter how small.
Ingredients
- 3 large eggs, room temperature: Temperature matters here as room temperature eggs achieve better volume when whipped, creating that essential light sponge
- 100 g granulated sugar: This amount provides just enough sweetness to balance the intense dark chocolate without becoming cloying
- 80 g all-purpose flour: The structure builder of your sponge layer, keeping it tender enough to support the mousse without collapsing
- 20 g unsweetened cocoa powder: Deepens the chocolate flavor of the sponge so it holds its own against the mousse
- 1/2 tsp baking powder: Gives just enough lift to prevent the sponge from becoming too dense
- 1/4 tsp salt: Enhances chocolate flavor in ways that sugar alone cannot achieve
- 30 ml whole milk: Adds moisture and tenderness to the sponge crumb
- 30 ml vegetable oil: Keeps the sponge moist without the solid texture that butter can sometimes create
- 1 tsp vanilla extract: Rounds out the chocolate flavors and adds aromatic depth
- 250 g high-quality dark chocolate: The star of the show, choose something you enjoy eating straight as the flavor really shines through
- 400 ml heavy cream, cold: Temperature is critical here for achieving proper volume when whipped
- 3 large egg yolks, room temperature: These create the luxurious, silky texture that defines a true French mousse
- 60 g granulated sugar: Dissolved into syrup, this cooks the yolks slightly while sweetening the mousse base
- 2 tbsp water: Creates the simple syrup that both sweetens and partially cooks the egg yolks
- 1/2 tsp vanilla extract: Brightens the rich dark chocolate mousse
- Pinch of salt: Essential for balancing sweetness and intensifying chocolate flavor
- 120 g dark chocolate, chopped: Forms the elegant, mirror-like glaze that makes this cake so impressive
- 80 ml heavy cream: Creates the glossy ganache glaze that coats the cake
- 1 tbsp unsalted butter: Adds shine and creates that professional looking finish on your glaze
Instructions
- Preheat your oven and prepare the pan:
- Set your oven to 350°F and grease a 9-inch springform pan before lining the bottom with parchment paper, this will be your foundation.
- Sift the dry ingredients together:
- In a bowl, combine flour, cocoa powder, baking powder, and salt, sifting them together to ensure even distribution throughout your sponge.
- Whip the eggs and sugar:
- Beat eggs with sugar until the mixture turns pale and has tripled in volume, about five minutes of steady work.
- Fold everything together gently:
- Incorporate the dry ingredients in careful motions, then drizzle in milk, oil, and vanilla, mixing just until combined.
- Bake the sponge layer:
- Pour the batter into your prepared pan and bake for 18 to 20 minutes until a toothpick comes out clean, then cool completely.
- Melt the chocolate for the mousse:
- Set chopped chocolate over a double boiler, stirring until completely smooth, then let it cool slightly while you prepare the rest.
- Create the sugar syrup:
- Combine sugar and water in a small saucepan, heating until the sugar dissolves and the mixture begins to simmer.
- Temper the egg yolks:
- While whisking yolks constantly, slowly pour the hot syrup into them until the mixture becomes pale and thick.
- Combine the chocolate base:
- Stir the melted chocolate and vanilla into your tempered yolks, adding that pinch of salt to deepen the flavor.
- Whip the cream:
- In a clean bowl, whip cold cream until it reaches soft peaks, being careful not to overwhip.
- Lighten and fold the mousse:
- Start by folding one third of the whipped cream into the chocolate mixture to lighten it, then gently incorporate the remaining cream.
- Prepare for assembly:
- Remove your cooled sponge from the pan, place it on a serving plate, and put the springform ring back around it.
- Add the mousse layer:
- Pour the mousse over your sponge, smooth the top, and refrigerate for at least four hours until completely set.
- Make the glossy glaze:
- Heat cream until it just begins to simmer, pour it over the chopped chocolate and butter, let it sit for a minute, then stir until smooth.
- Finish the cake:
- Release the cake from the pan, pour the cooled glaze over the top letting it drip down the sides, then chill for 30 minutes.
 Pin It
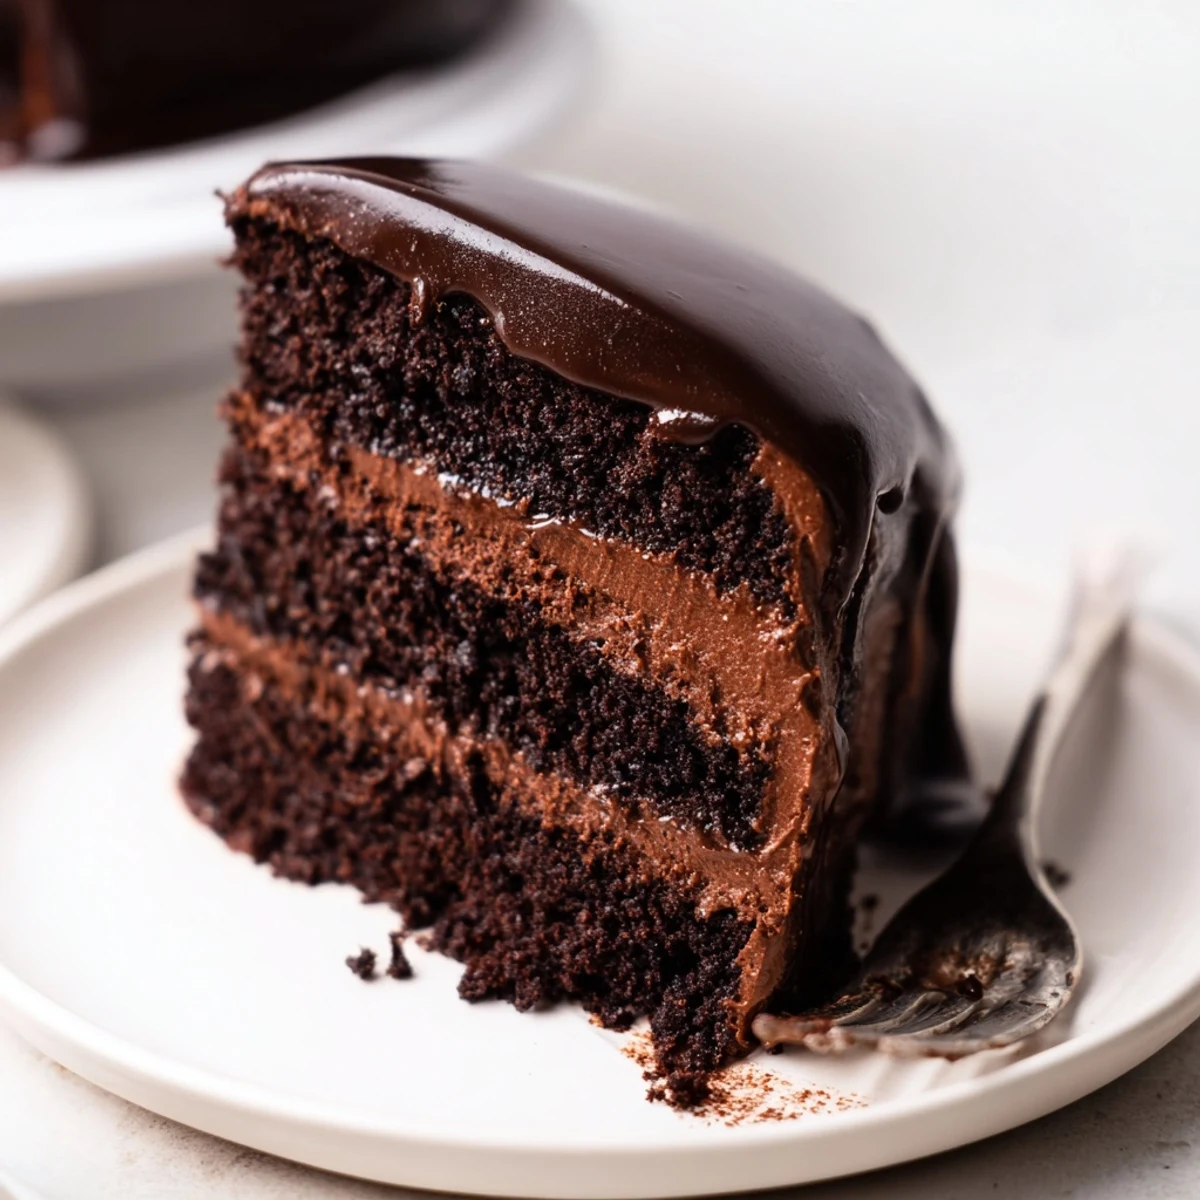
 My mother still talks about the first time she tasted this cake, how she cut impossibly thin slices just to make it last longer. Something about that combination of textures, the way the light mousse gives way to the substantial sponge, makes people slow down and savor each bite instead of rushing through dessert.
Making It Ahead
The beauty of this cake is that it actually improves with a day or two in the refrigerator. The flavors deepen and the texture becomes more cohesive, making it an ideal make ahead dessert for dinner parties or special occasions.
Choosing Your Chocolate
Since chocolate is the main event here, invest in something you truly enjoy eating on its own. That 60 to 70 percent range hits the perfect balance between intense flavor and workable texture for both mousse and glaze.
Serving Suggestions
A small slice goes a long way with this rich dessert, making it perfect for sharing. Consider serving with fresh raspberries or a dollop of lightly sweetened whipped cream to cut through the intensity.
- Use a hot knife dipped in warm water for the cleanest slices
- Let the cake sit at room temperature for 15 minutes before serving for the best texture
- Garnish just before serving to keep the presentation fresh and elegant
 Pin It
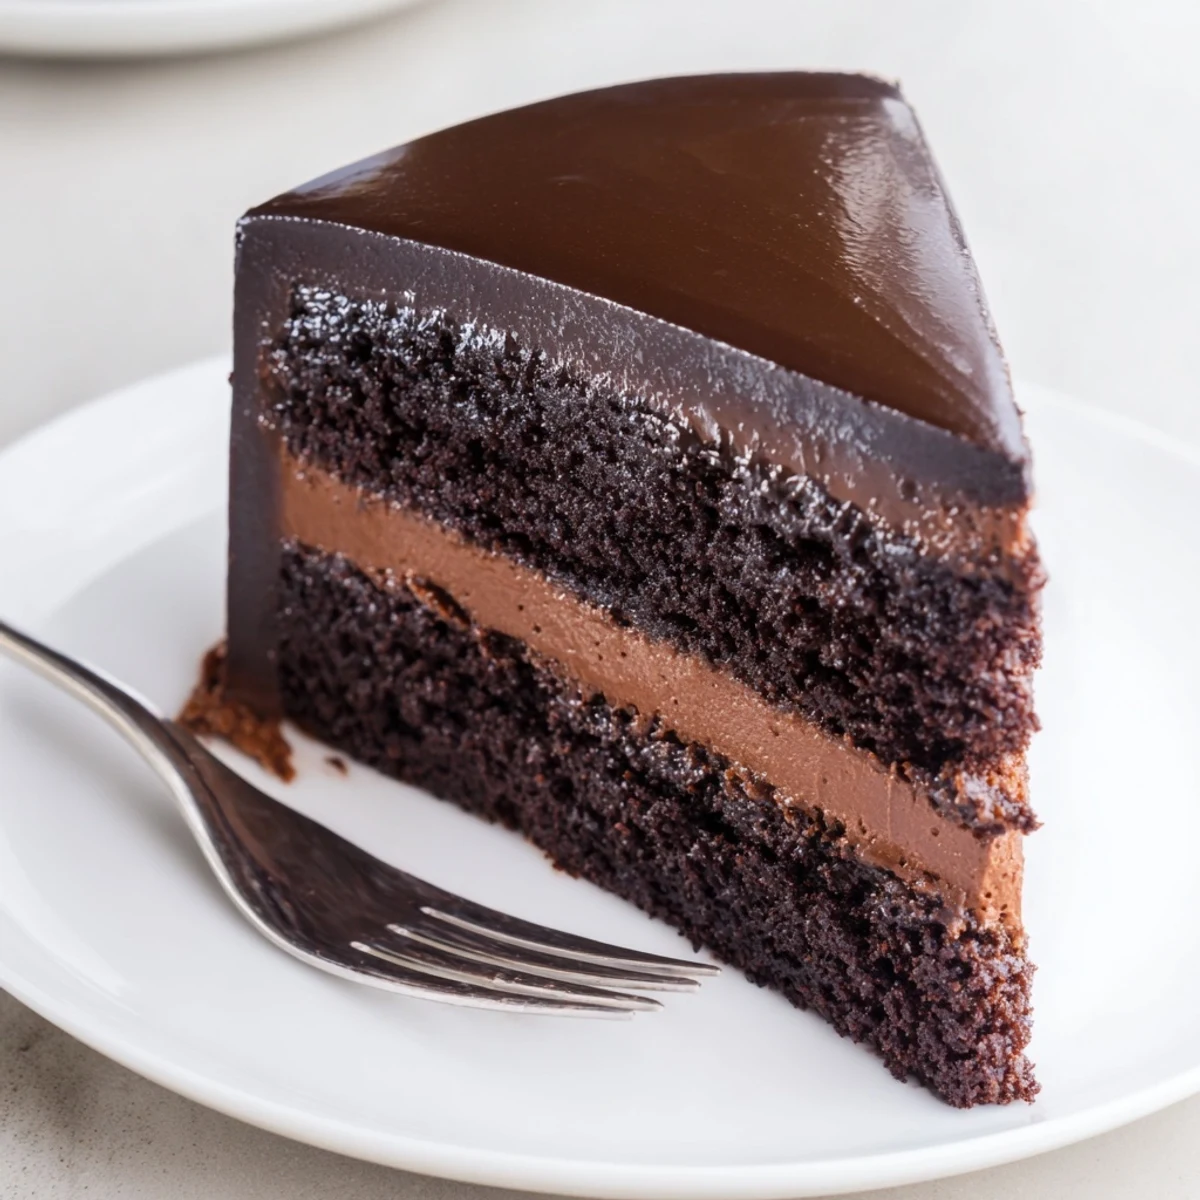
 There is something deeply satisfying about serving a dessert that looks this impressive and tastes even better. Every slice feels like a small celebration of the craft.
Recipe Questions & Answers
- → Can I prepare this dessert ahead of time?
-
Absolutely. The assembled mousse cake needs at least 4 hours to set, so it's perfect for making the day before. Keep it refrigerated until ready to glaze. Add the glossy chocolate topping no more than 6 hours before serving to maintain its shine.
- → What percentage of dark chocolate works best?
-
For optimal results, use dark chocolate between 60-70% cocoa. Higher percentages create a more intense flavor but may result in a firmer mousse. Lower percentages yield sweeter results with a softer texture.
- → Can I substitute pasteurized egg products?
-
Yes, pasteurized egg yolks or liquid egg yolk products work perfectly and eliminate food safety concerns. The texture remains consistent, though pasteurized yolks may take slightly longer to thicken when combined with hot syrup.
- → How do I achieve the glossy finish?
-
The key is temperature. Let the glaze cool for exactly 10 minutes after mixing—it should be warm but not hot. Pour it over the chilled surface in one smooth motion, starting from the center and letting it cascade naturally down the sides.
- → What's the best way to slice this dessert?
-
Use a sharp knife dipped in hot water and wiped dry between cuts. Slice with one smooth motion rather than sawing. For clean restaurant-style portions, wipe the blade clean and reheat after every two slices.
- → Can I freeze leftovers?
-
Freezing works well before adding the final glaze. Wrap individual portions or the whole cake tightly in plastic and freeze for up to 1 month. Thaw overnight in the refrigerator before glazing or serving.
