 Pin It
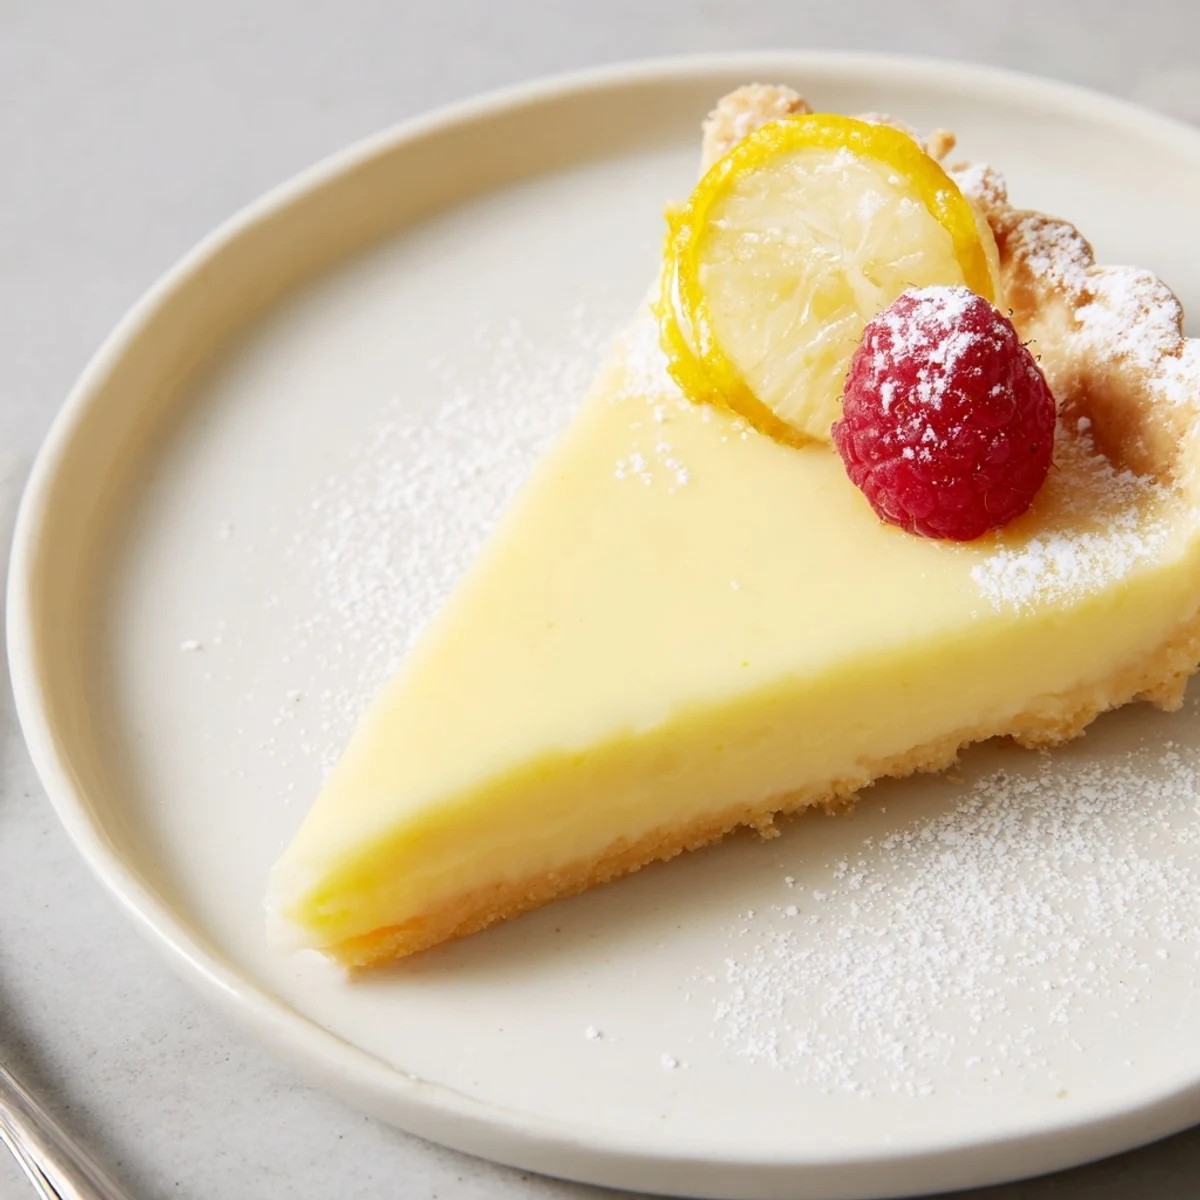
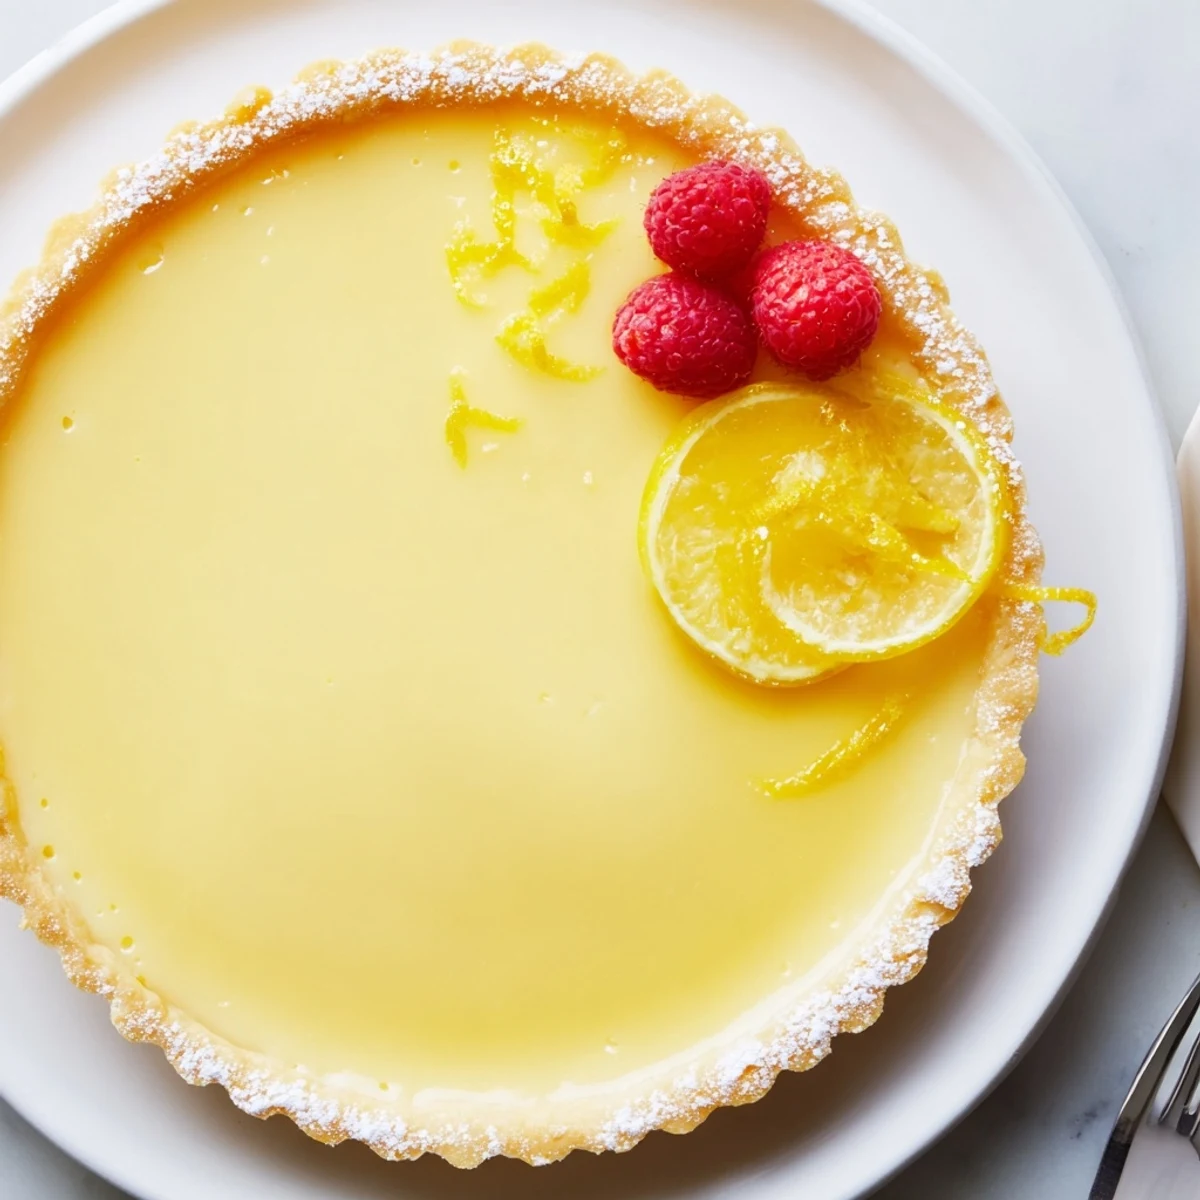
 Prepare a crisp, buttery crust by pulsing flour, powdered sugar and cold butter, then bind with an egg yolk and a splash of cold water. Chill, roll to 1/8 inch and blind-bake at 350°F until golden. Whisk heavy cream, sugar, eggs and extra yolks with lemon zest and juice, pour into shell and bake at 300°F until edges set. Cool fully and chill at least one hour before dusting and serving; yields 8 slices.
The scent of grated lemon zest always brings a little burst of life into the kitchen, and nothing showcases that brightness quite like this creamy lemon tart. One afternoon, after an impromptu chat with a friend about our favorite citrus desserts, I decided to see just how silky I could get a lemon filling. The result is a tart with a crisp, buttery shell and a custard so tangy and luxurious that it almost feels like sunshine on a plate. Every time I make this, the process rewards me with a sense of calm and a massive payoff at dessert time.
Last spring, I brought this tart to a picnic in the park—basket swinging, birds singing, and all. Within minutes, blanketed in soft grass, everyone watched as I sliced it and the perfect, golden edges revealed themselves. Even the self-declared citrus skeptics asked for seconds, surprised that something so tart could also taste comforting. It became clear this was not just another dessert; it was a moment-maker.
Ingredients
- All-purpose flour: This is the backbone of the crust; I’ve learned to keep it cool to guarantee extra flakiness.
- Powdered sugar: It sweetens the crust subtly, leaving most of the sugar to complement the tangy filling.
- Salt: Just a pinch is enough to heighten all the surrounding flavors, never overpowering.
- Unsalted butter: Using cold, cubed butter is essential; letting it melt even slightly while mixing makes the crust dense instead of light.
- Egg yolk: This adds richness and structure, and I always make sure it's well blended before adding water.
- Cold water: Add it drop by drop—too much can make the dough sticky, and too little leaves it crumbly.
- Heavy cream: The secret to that creamy, custard-like texture I once tried to achieve with milk (it wasn’t the same).
- Granulated sugar: White sugar brings sharp sweetness and makes the filling set just right.
- Eggs and egg yolks: Extra yolks are what keep the filling velvety and stable; whisk them thoroughly to avoid streaks.
- Lemon zest: Use a microplane for the brightest, most fragrant zest—don’t skip this, it’s what makes the flavor pop.
- Fresh lemon juice: I always squeeze it right before mixing; bottled just doesn’t have the same zing.
- Powdered sugar (for garnish): A quick dusting adds a touch of elegance before serving.
- Fresh berries or candied lemon slices: These add a pretty, fresh finish, especially if serving guests.
Instructions
- Get That Oven Ready:
- Preheat your oven to 350°F (175°C) while you gather your ingredients, letting the anticipation and a bit of warmth fill the kitchen.
- Make the Crust:
- Combine your flour, powdered sugar, and salt in the food processor, then add cold cubed butter and pulse until the mixture’s texture reminds you of a crumbly shortbread.
- Add Wet Ingredients:
- Add the egg yolk and two tablespoons of ice water, pulsing just until it comes together—stop before it turns into a sticky dough monster.
- Chill Out:
- Form the dough into a disk, wrap it up, and give it at least 30 minutes in the fridge so the butter stays cold for flakiness later.
- Roll and Press:
- Roll the chilled dough to 1/8-inch thickness, carefully line the tart pan, trim the edges, prick the base, and pop it in the freezer for a quick 10-minute chill.
- Blind Bake:
- Line the crust with parchment, fill with weights or beans, and bake for 15 minutes; remove weights and bake again until golden and crisp, about 8–10 minutes.
- Make the Filling:
- Lower the oven to 300°F (150°C); in a bowl, whisk together cream, sugar, eggs, yolks, zest, juice, and salt until it looks silky and you see no sugar granules.
- Assemble and Bake:
- Pour your smooth filling into the cooled crust and bake for 20–25 minutes, waiting as the edges set but the center still gives a gentle jiggle when nudged.
- Cool and Chill:
- Cool the tart completely on a rack, then refrigerate for at least an hour—even longer if you love extra clean slices.
- Garnish and Serve:
- Just before serving, dust with powdered sugar and scatter berries or candied lemon slices for the final flourish.
 Pin It
 Serving this tart at a small dinner party last summer, I watched a group of old friends trade stories and laughter between forkfuls. That’s when I realized this recipe does something wonderful—it leaves people lingering happily at the table, reaching for just one more sliver.
The Magic of Chilling Time
Letting the tart chill transforms the texture from good to dreamy—you get slices that stand tall and keep their form, and the filling turns dense yet soft. I always use that downtime to tackle the dishes, knowing the wait pays off with every creamy bite. The first few times I rushed and cut in early, the filling wept a little and the slices crumbled, so now I always set a timer. If you can chill it overnight, the tart develops even better flavor.
Getting That Zest Just Right
I used to think zesting was just an optional add-in until I forgot it once and noticed the filling lacked that perfume I now associate with this tart. The aroma of lemon zest as you grate it is a promise of what’s to come; it lingers in the kitchen and makes people wander in to see what’s baking. A microplane works best for super fine, even results. Scrape only the yellow part, since the white pith gives bitterness you won’t want here.
Tips From a Few Tart Mishaps
Crust breaking, filling bubbling over, edges browning a bit too fast—after plenty of attempts, these little mistakes have become part of the story. If your tart edges are getting too dark, you can tent them with foil for the final bake. It’s also smart to put the tart pan on a rimmed baking sheet, just in case you fill it too generously. And never, ever skip pricking the crust—it helps keep air bubbles at bay.
- Double check your tart pan’s seal to avoid any leaks.
- If you’re out of pie weights, dried beans work just as well.
- When you unmold the tart, use gentle fingers to keep the edges crisp and neat.
 Pin It
 This creamy lemon tart serves up sunshine on even the grayest day and feels right for celebration or just a craving for something truly fresh. Enjoy sharing it, and don’t be surprised when everyone asks for the recipe.
Recipe Questions & Answers
- → How do I prevent a soggy crust?
-
Blind-bake the chilled crust with parchment and weights until the base is set and lightly golden, then remove weights and finish baking briefly to dry the surface before adding the filling.
- → Can I use a pastry blender instead of a food processor?
-
Yes — cut cold butter into the flour and sugar with a pastry blender until coarse crumbs form, then work in the yolk and water to bring the dough together; keep everything cold to ensure a flaky crust.
- → Why is the filling slightly jiggly when done?
-
A slight wobble in the center indicates the custard will finish setting as it cools. Overbaking makes it grainy, so remove once the edges are set and the middle retains a gentle jiggle.
- → What are good substitutions for heavy cream?
-
For a lighter texture, use a combination of whole milk and a bit of melted butter, though the filling will be less rich. For dairy-free options, use a full-fat plant cream alternative, adjusting sweetness as needed.
- → How long can I store the tart?
-
Keep chilled in an airtight container for up to 3 days. Dust with powdered sugar and add fresh berries just before serving for best appearance and texture.
- → Any tips for extra lemon aroma?
-
Add a teaspoon of vanilla extract to the filling or increase the lemon zest slightly; zest packs aromatic oils that boost brightness without adding more acidity.
